Skip to content

Maintenance plans

Fire extinguishers yearly, ladders every six months, the heating system before heating season: a maintenance plan describes once which items get checked at which interval with which checklist — Mango Inventory creates the tickets for it automatically.

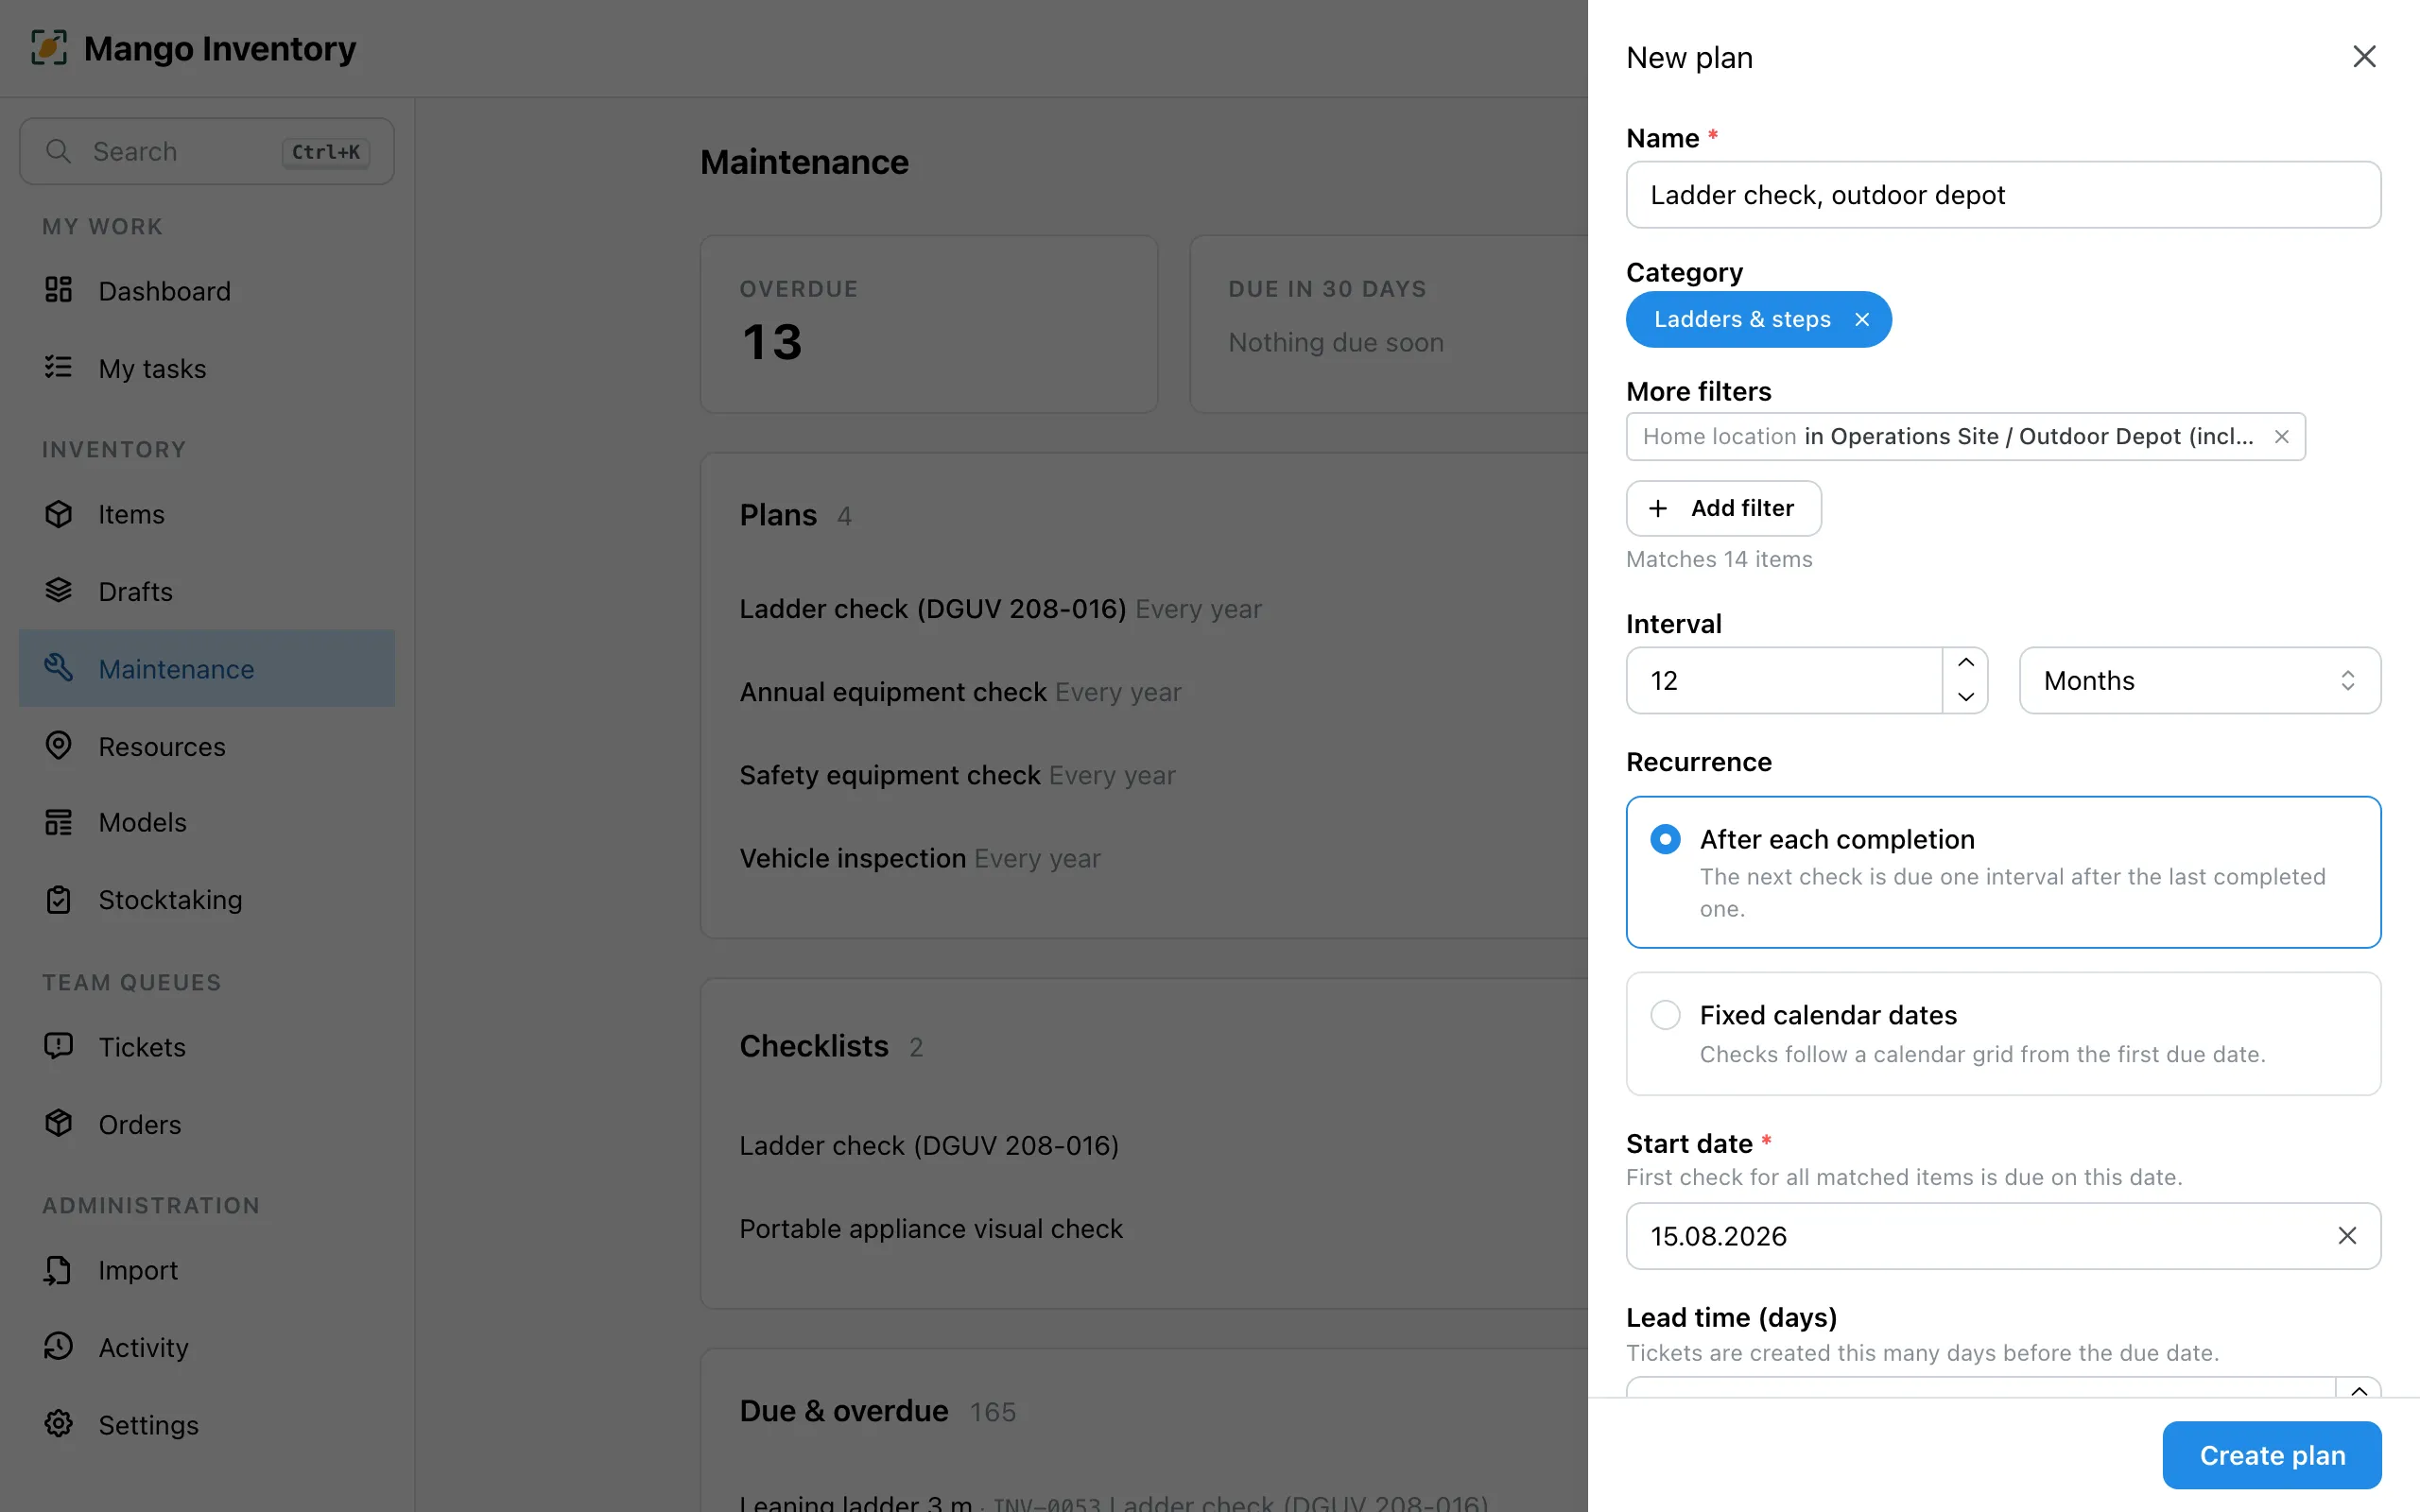
  1. Under “Maintenance” → “New plan”: pick the items by category — clicking a category drills into its sub-categories (e.g. “Tools” → “Power tools”). If the category alone isn’t enough, “More filters” → “Add filter” adds further conditions. The line below shows live how many items the plan matches — and new items that match later are included automatically.

  2. Set the interval and recurrence: “After each completion” (preselected) makes the next check due one interval after the last — “Fixed calendar dates” follows a fixed grid, say every August 1st.

  3. Optionally set a start date: then every item’s first check is due on that date. Without a start date, the first check is due immediately — Mango Inventory assumes the stock needs an initial check. The lead time determines how many days before the due date the ticket appears.

  4. Optional: a checklist (check items, with photo proof where needed) and a default assignment — person or team.

    New maintenance plan: the category and location filters with their match count, interval, recurrence, start date and lead time

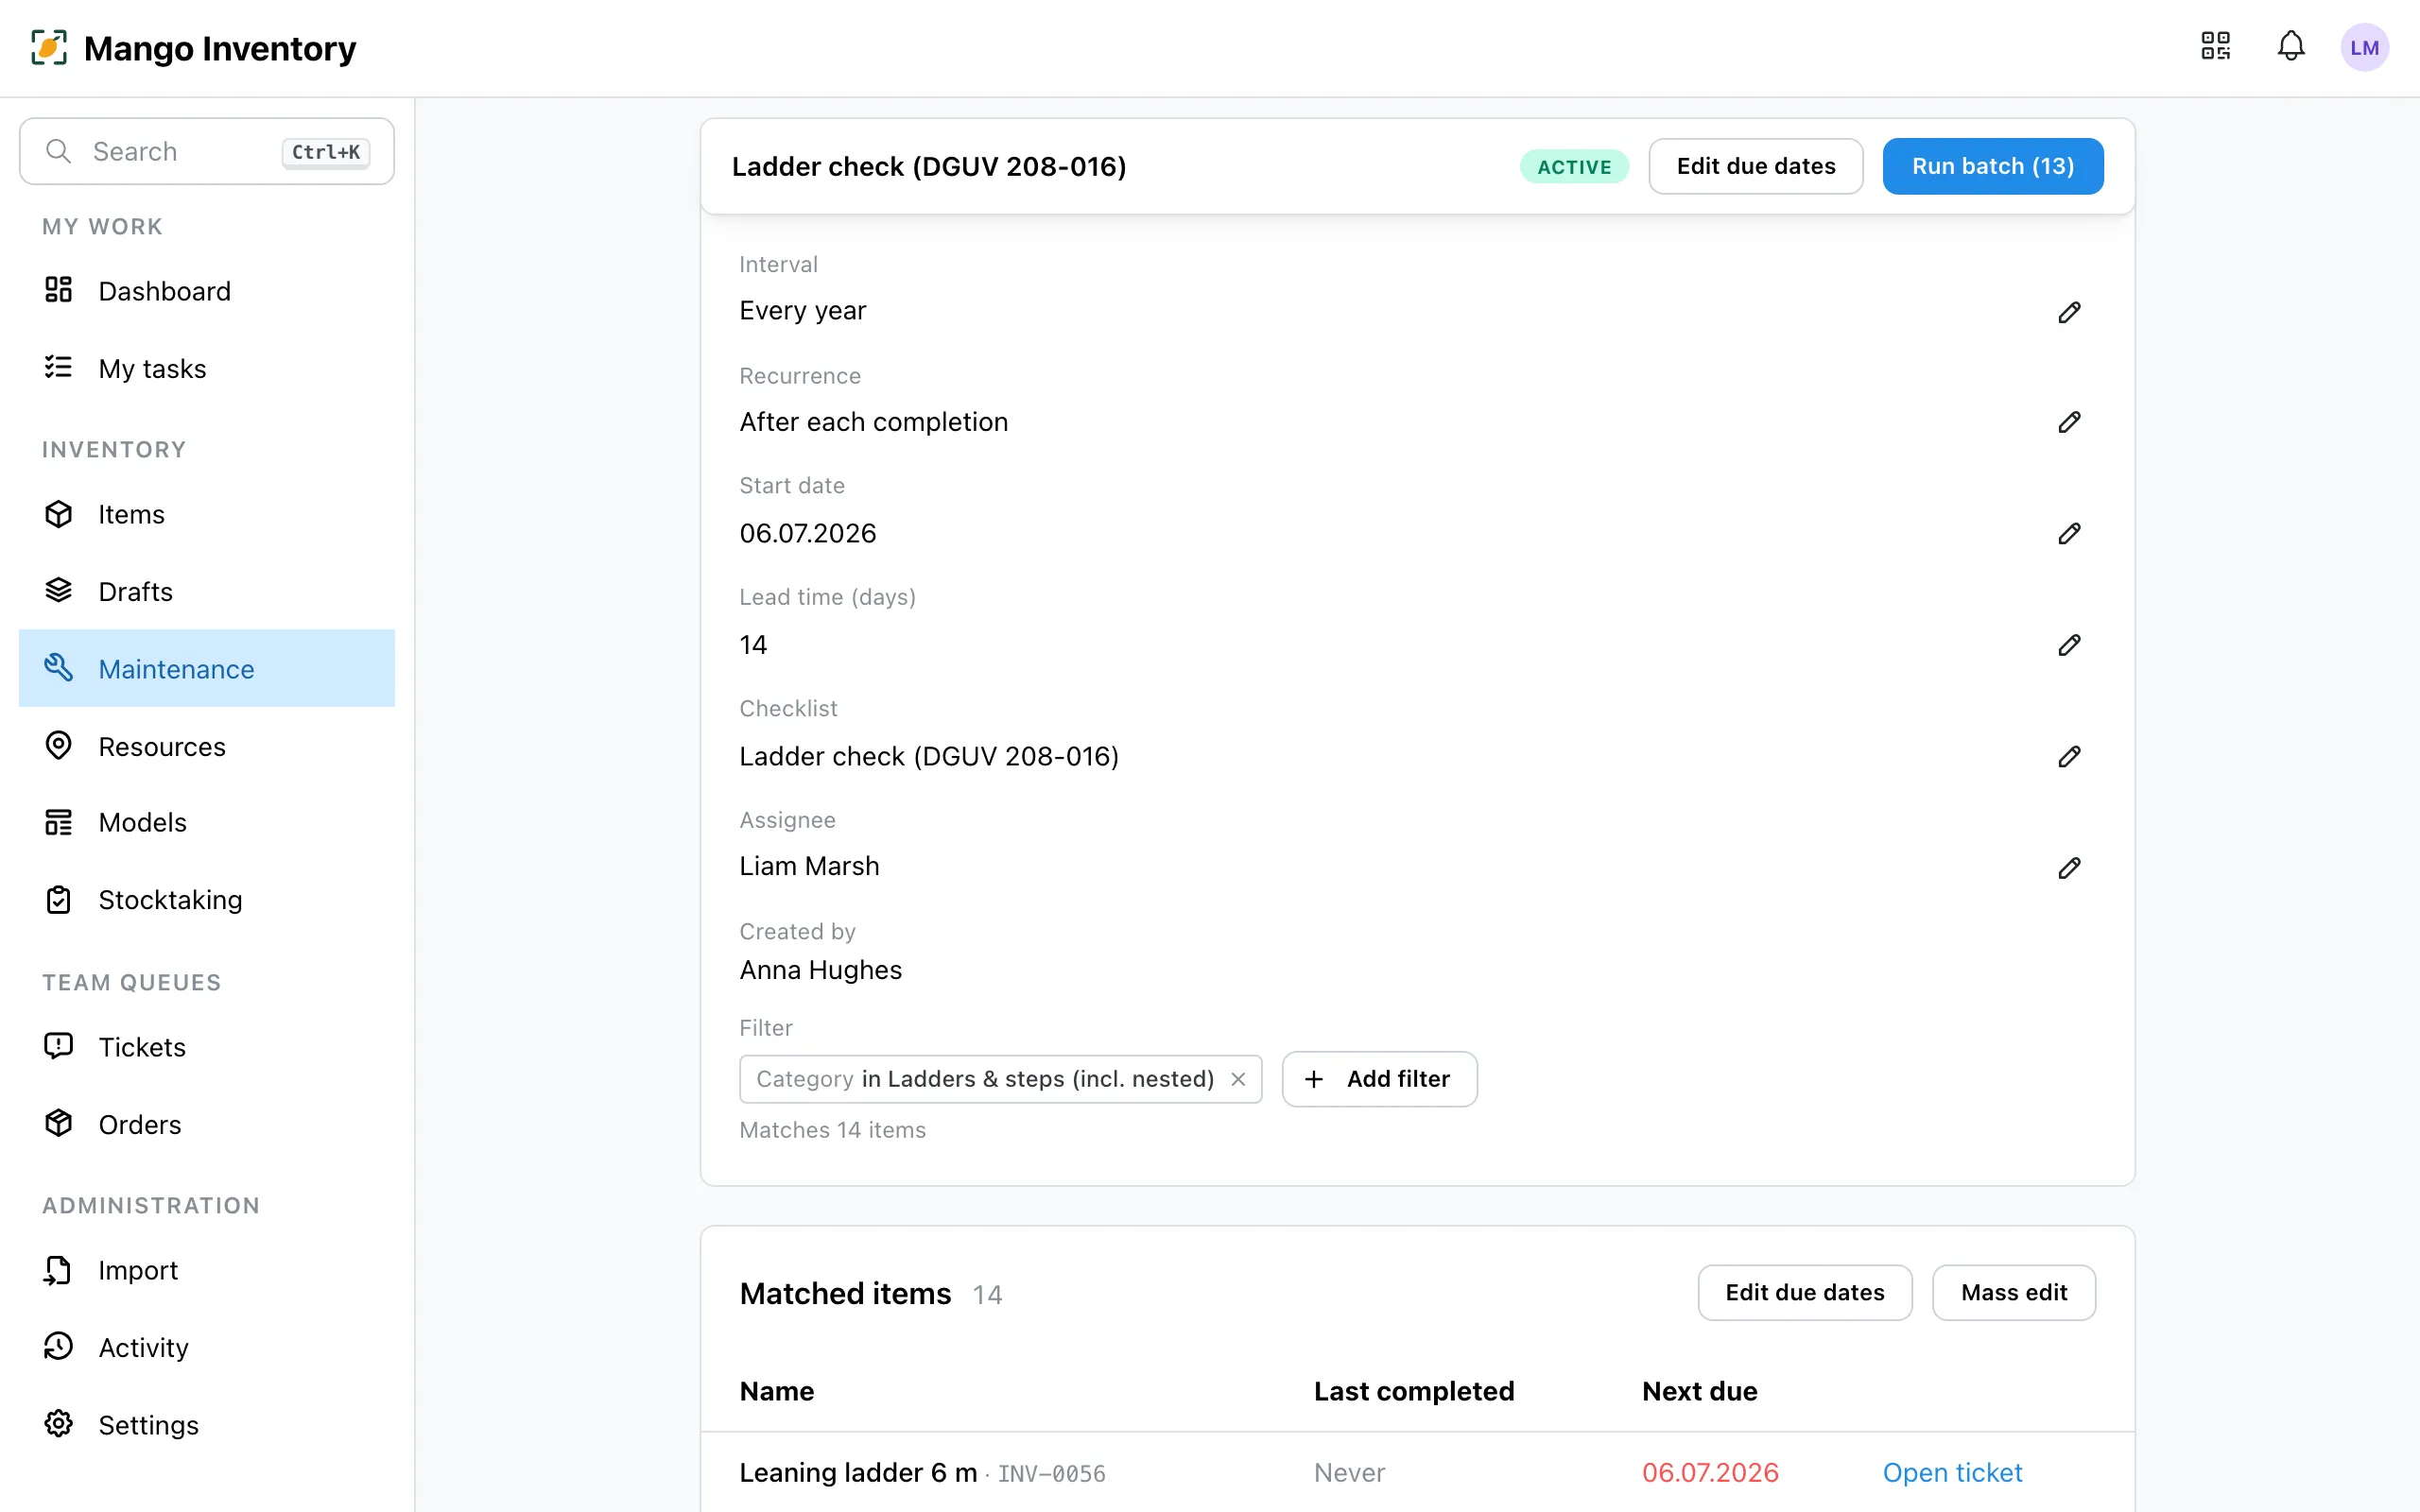
A plan’s detail page shows the covered items with “Last completed” and “Next due”. “Show all” — the row names the count — opens the full table: there you adjust the next due date per item individually (as long as no check has been completed yet) or set a shared date with “Set date for all”. For many dates at once — say, from an existing Excel list — “Edit due dates” opens fill-in mode: every row shows an open date field, and Enter jumps to the next.

And when capturing new items, Mango Inventory asks for the first due date right away: if a new item matches an active plan’s filter, a prefilled required field with the computed date appears in the capture form — adjustable, so the date is right from the start.

The items table also shows each item’s earliest due date in the “Next check” column — overdue dates marked red, and the “Check overdue” quick filter answers “What must not be handed out right now?” with one click, in the mobile app too.

A maintenance plan's detail page

When a due item gets checked, the responsible person ticks off the checklist in the ticket. A failed check item records the finding first — the linked defect ticket is created once the checklist is closed as failed: with “Record issue” in the check round, or with “Mark as failed” on the ticket, which then offers “Create follow-up ticket”. That way the defect doesn’t get lost. After completion, the next due date is computed automatically.

40 ladders, one afternoon: instead of opening every ticket individually, you work through all of a plan’s open checks as one check round — on the phone, out in the building.

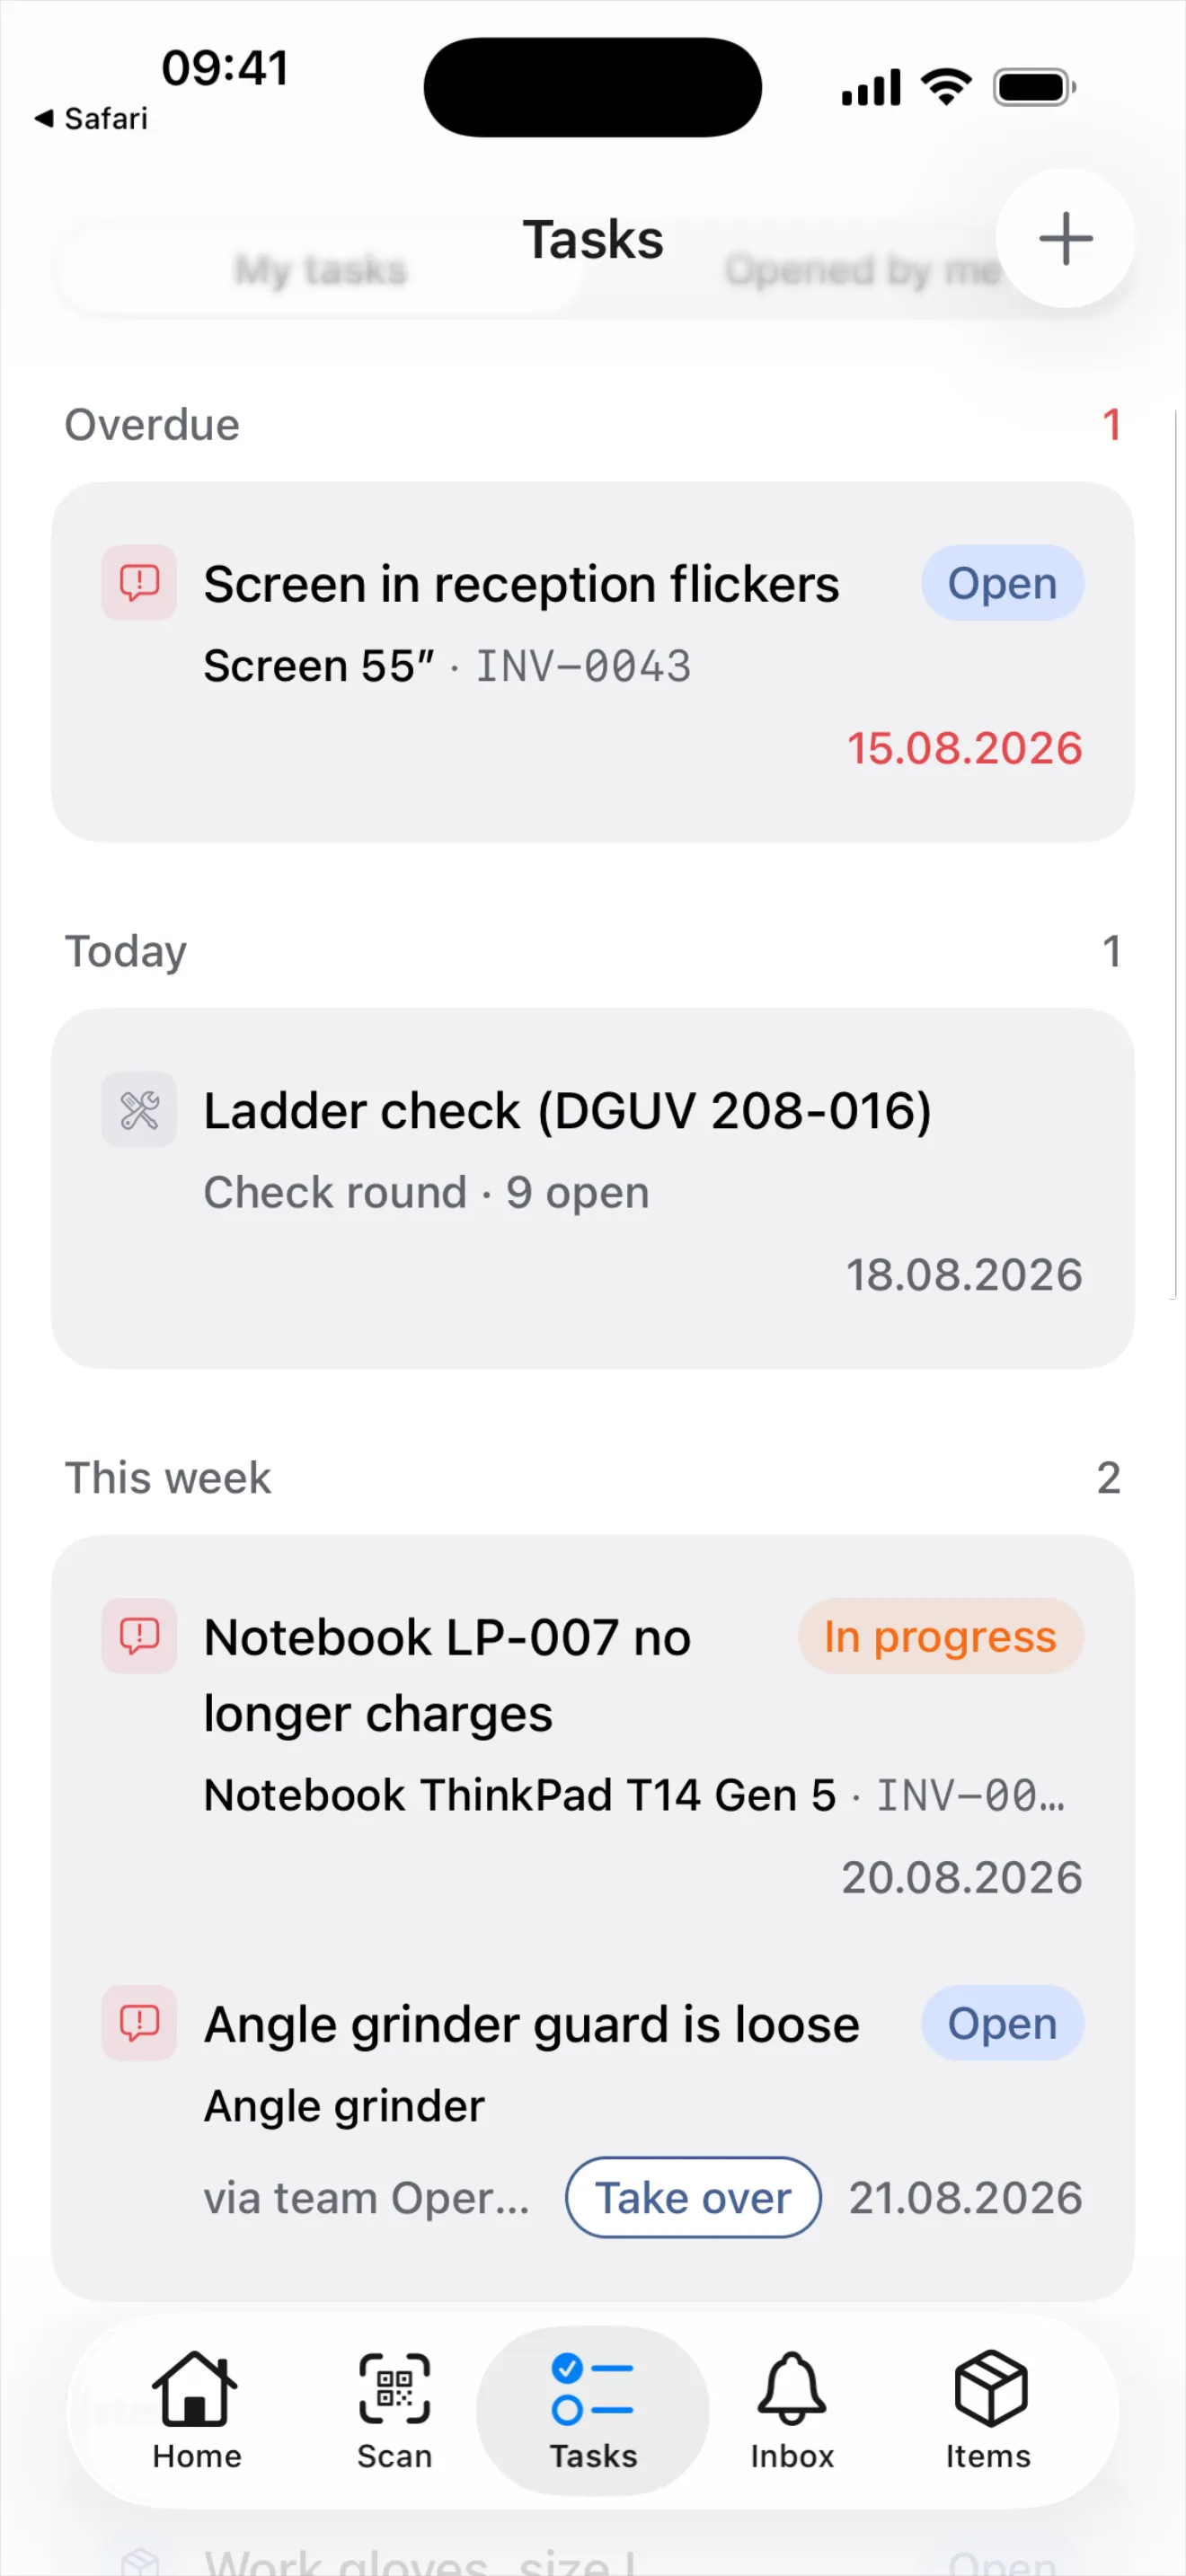
  1. One round, one row. Under “My tasks”, a plan’s open checks appear not as nine separate tickets but as a single task: “Check round · 9 open”, with the earliest due date. A tap on it opens the round. At the computer, “Run batch (9)” on the plan’s detail page leads there, and so does “Start check round” in an individual check ticket.

    "Tasks" on the phone: under "Overdue", a single defect ticket with its date in red, and below it, under "Today", the aggregated row "Ladder check (DGUV 208-016) · Check round · 9 open" with the earliest due date

    Nine due checks, one task: the check round under “My tasks”.
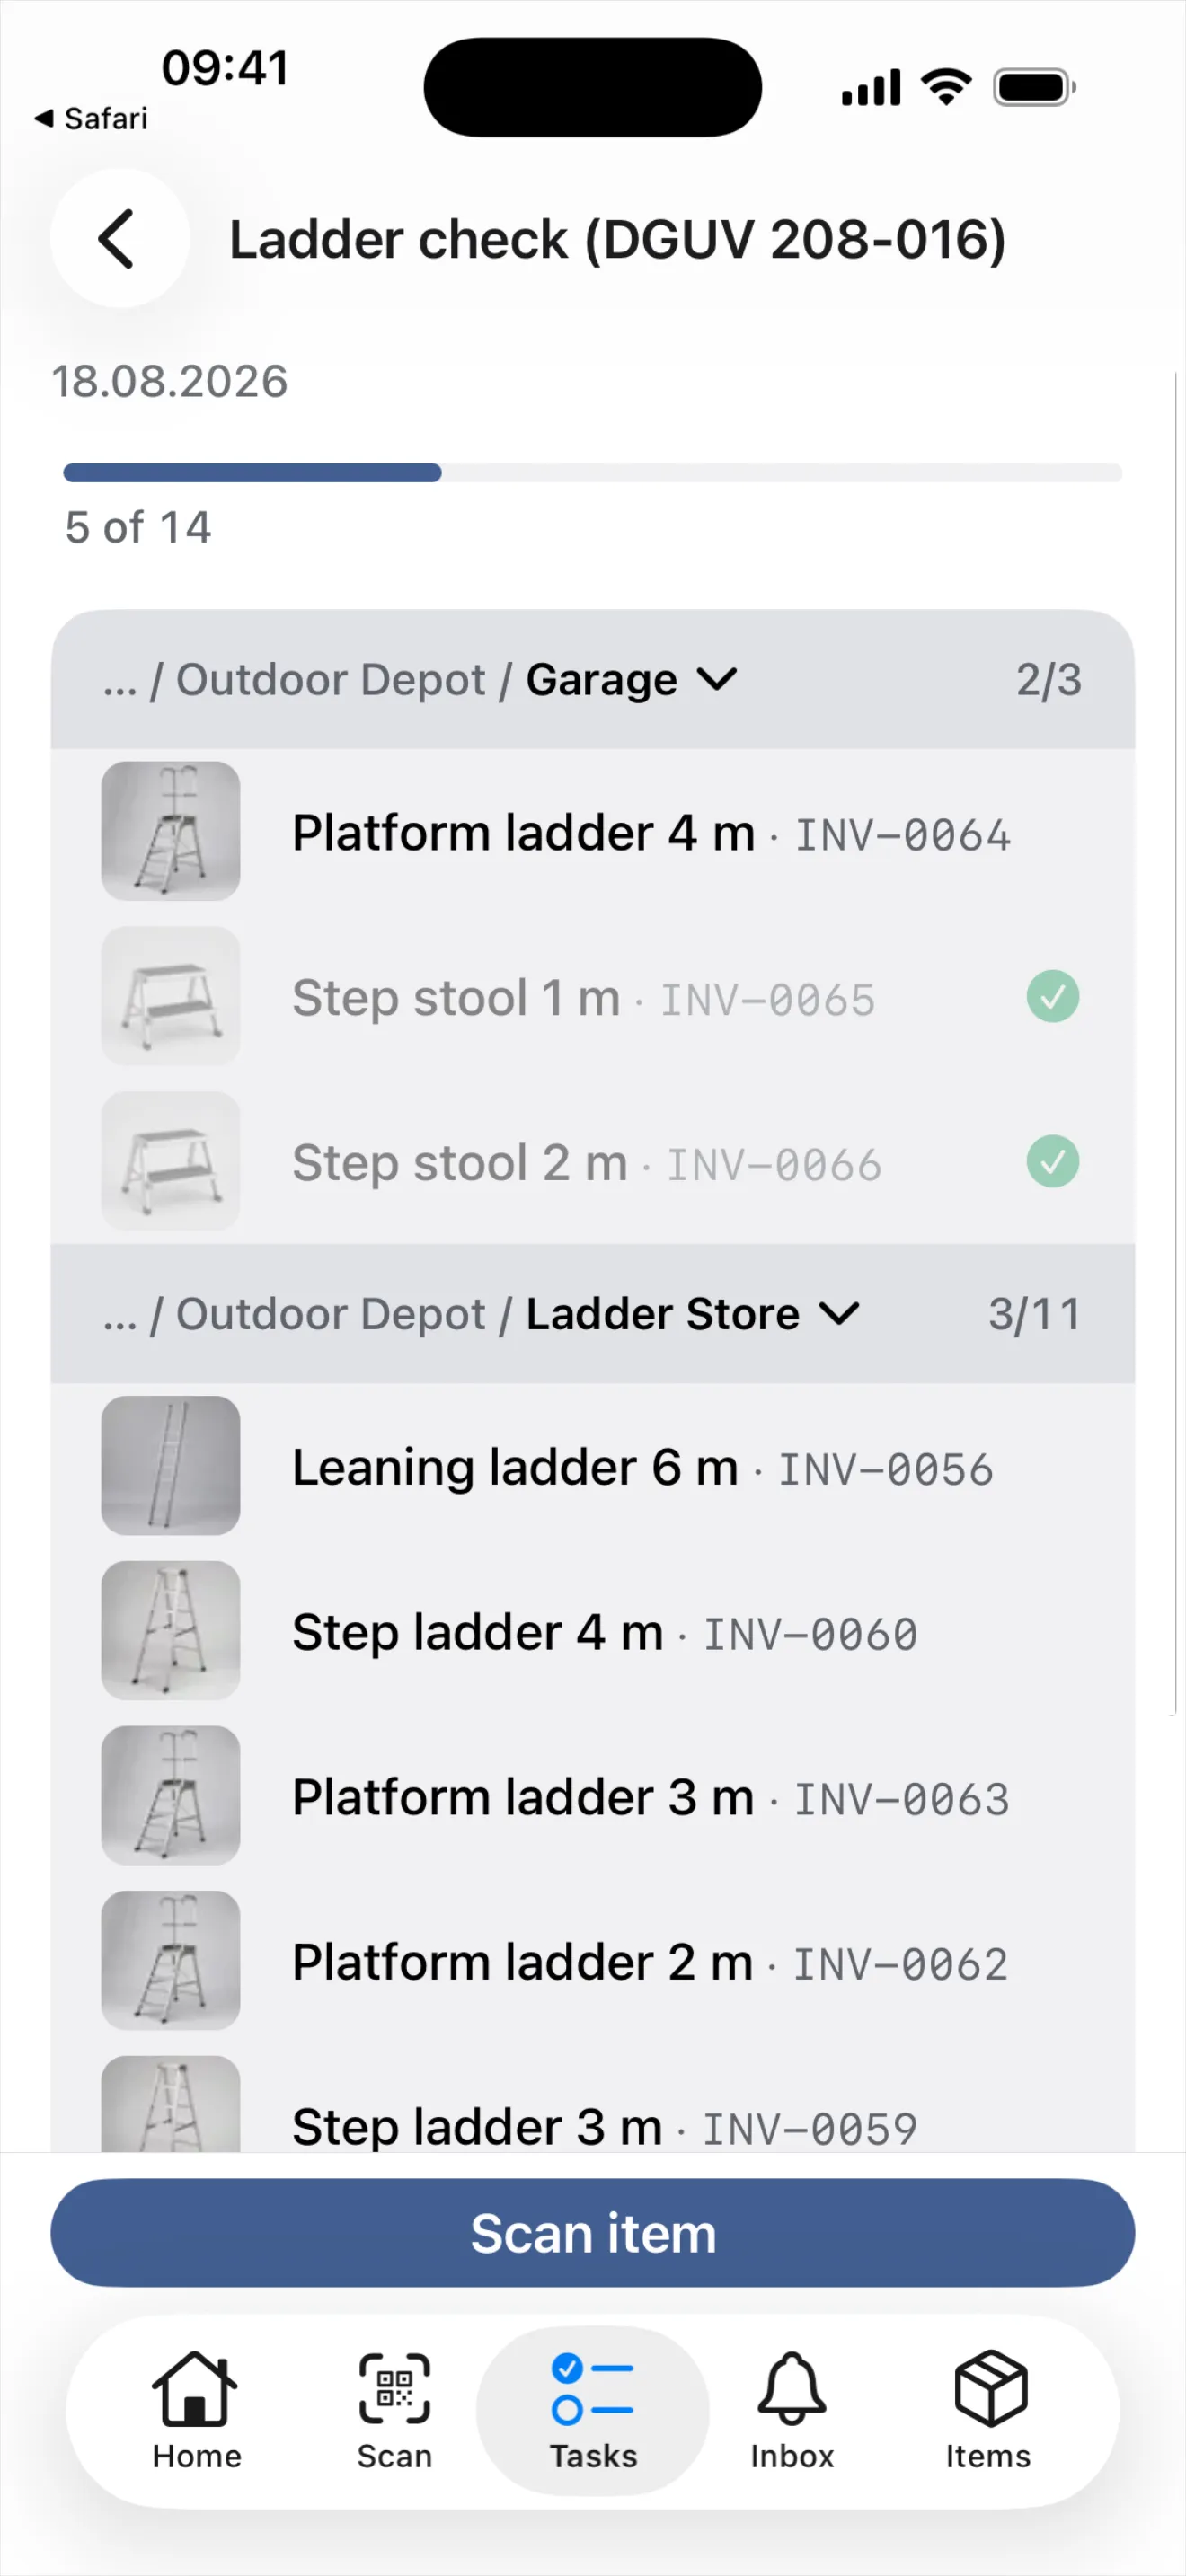
  2. Room by room, not row by row. The round groups its checks by location: one band per room with its own tally (“2/3”), and a tap collapses it. So you walk the building the way it was built — the round prescribes no order and suggests no “next” item; you tap the check you are standing in front of. Above it, a progress bar reads “5 of 14”; if the whole round shares one due date it is stated once below the title, otherwise on every row. Finished checks don’t disappear: they stay dimmed at the bottom of their room, with a check mark or a warning glyph, and can be reopened to re-read what was recorded. Items with no location gather in the “No location” band at the end. And if you’d rather not scroll, scan: “Scan item” in the bar at the bottom opens the camera, a recognized code presents the item as a card, and “Open item” jumps to its check. At the computer the round shows the same list; as long as no check is open there, “Start” and the Enter key pick out the first one still open.

    The "Ladder check (DGUV 208-016)" check round on the phone: the "5 of 14" progress bar, location bands — "… / Outdoor Depot / Garage 2/3" and "… / Outdoor Depot / Ladder Store 3/11" — with the ladders, their photos and barcodes, and the "Scan item" bar at the bottom

    One band per room, one tally per band — the bar holds the whole round’s state.
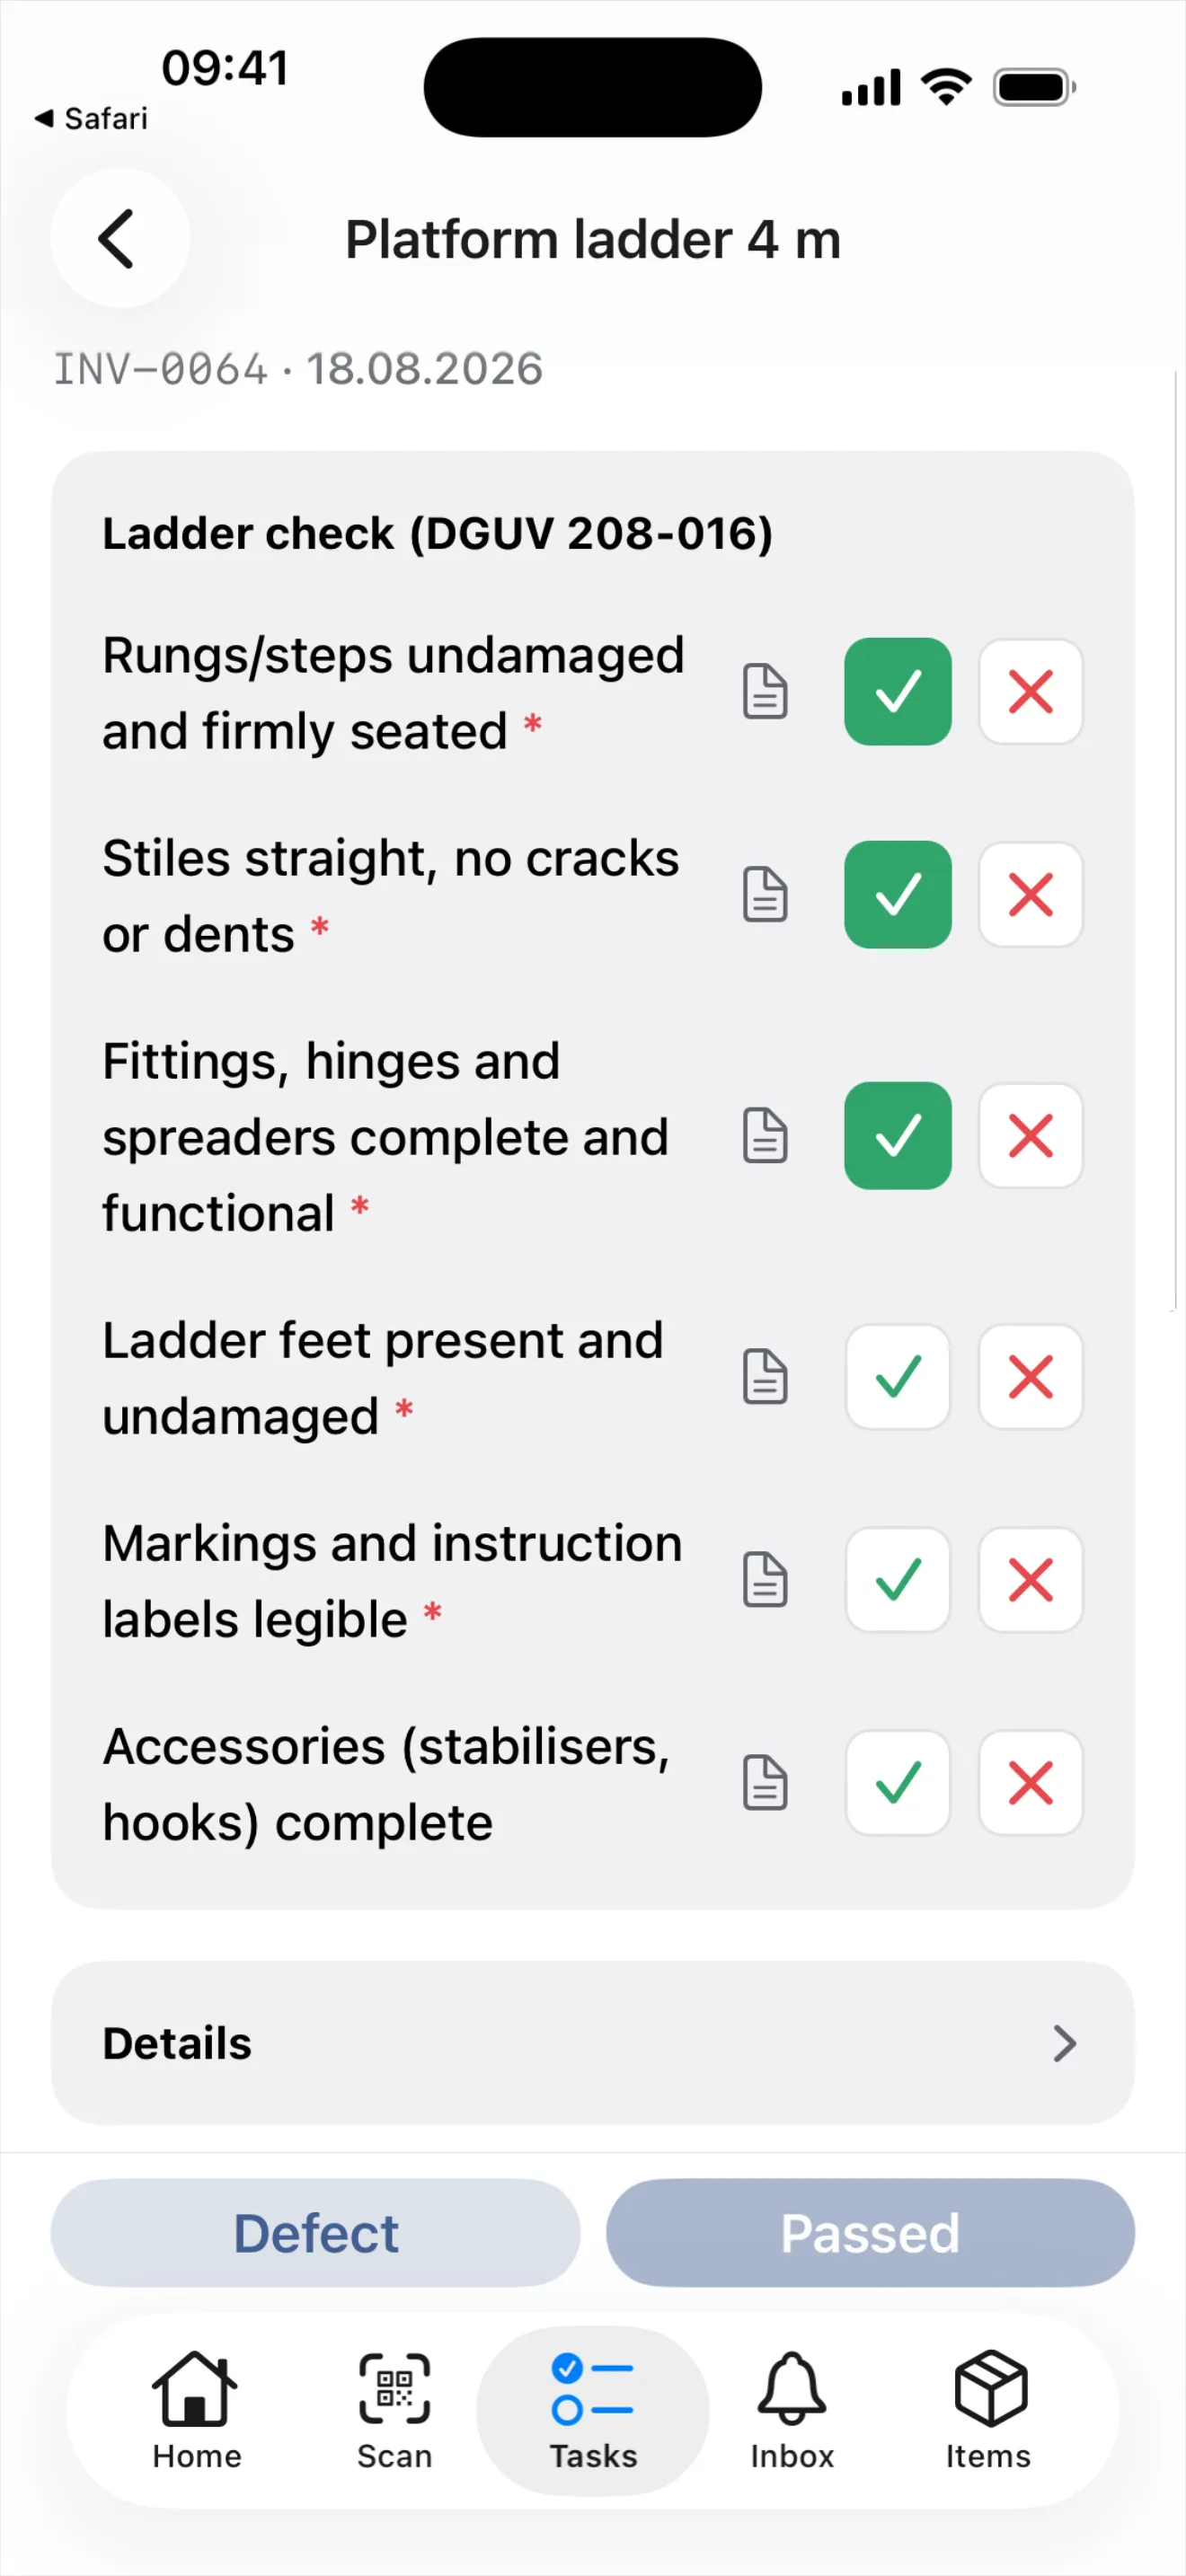
  3. Check and pass. A single check is a full ticket: the checklist on top, collapsed “Details” below it, plus photos and documents, comments and activity. Every required check item — marked with a red asterisk — is answered individually, green check for “Pass”, red cross for “Fail”; only then does “Passed” complete the check, at the computer also with the Enter key. You then land back in the round rather than automatically on the next item — where you go next is your call, out in the room. Observations that belong to no single check item — say, “access to the fire extinguishers was blocked” — go on the ticket as a comment, by “Dictate comment” if you like; each check item also has a note of its own.

    A single check on the phone: "Platform ladder 4 m" with the "Ladder check (DGUV 208-016)" checklist, three of six check items answered green, and the bar with "Defect" and a still-disabled "Passed" at the bottom

    Answer item by item, then “Passed” — the round takes the check in.
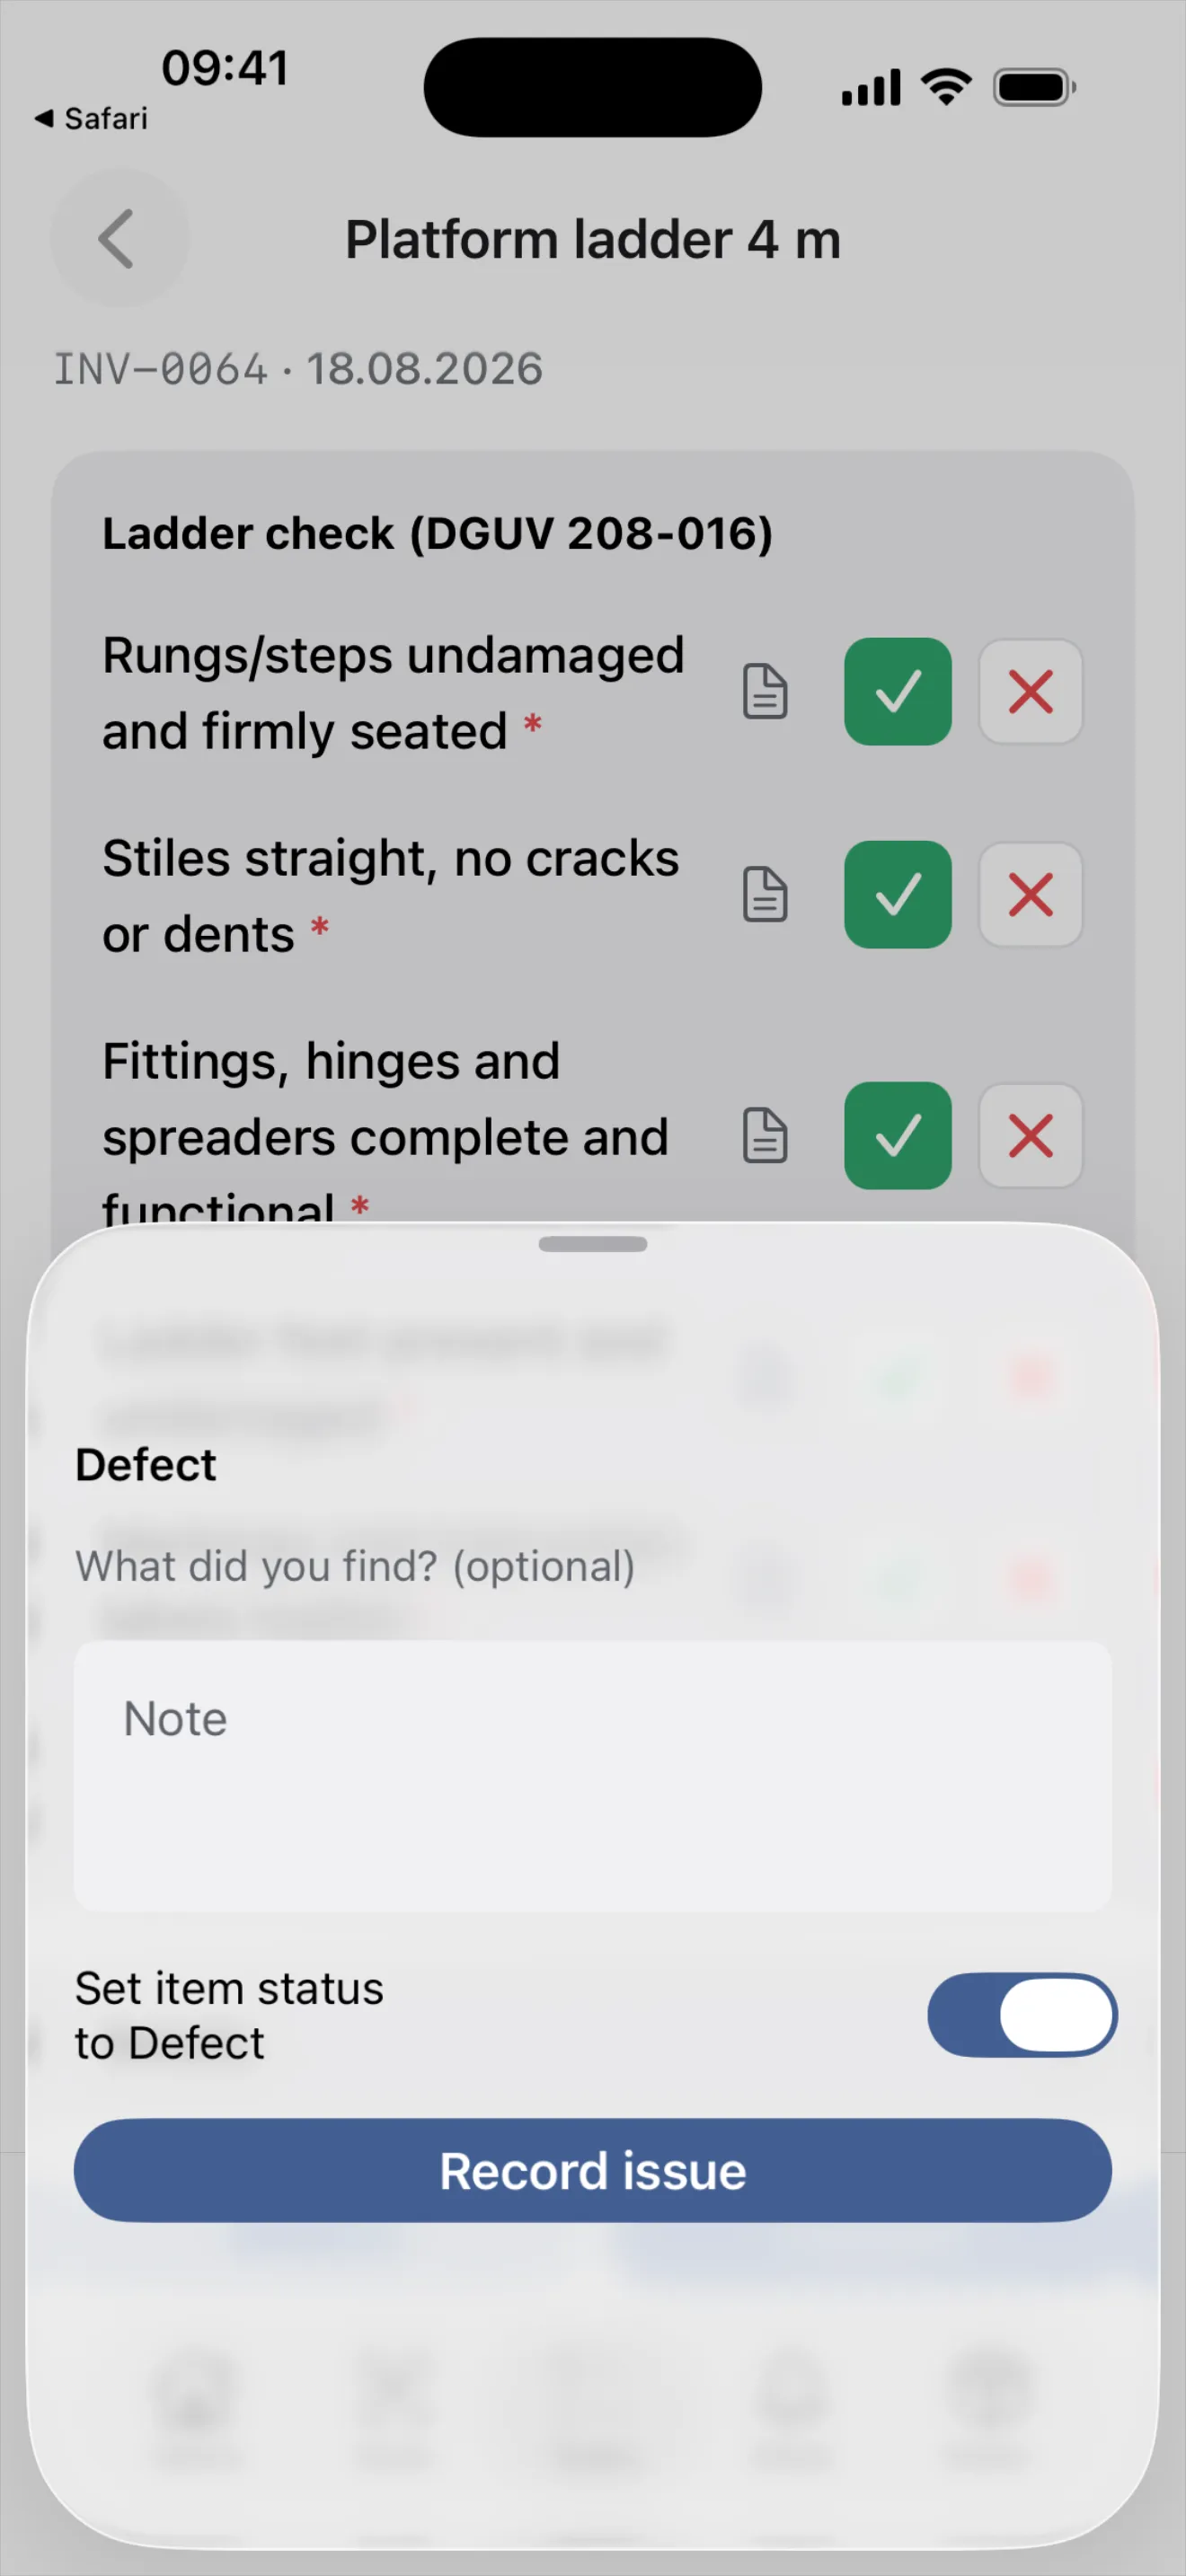
  4. Record the defect. If something isn’t right, “Defect” opens the finding step: the failed checks at a glance, the field “What did you find? (optional)” and the “Set item status to Defect” switch, on by default. “Record issue” completes the check and creates the linked defect ticket — the finding doesn’t get lost. A check with a defect still counts as performed; the next due date is computed as usual. Only what genuinely wasn’t checked stays due, and that runs through “Skip this check” in the ticket’s checklist — with a reason and a confirmation, not a button you brush past.

    The defect step as a bottom sheet on the phone: the "Defect" heading, the "What did you find? (optional)" field with its "Note" placeholder, the "Set item status to Defect" switch turned on, and the "Record issue" button

    The finding in one step: note it, set the status, get the defect ticket.

Interrupting is safe — the round only writes what you complete. Open it again the same day and the progress is right there: what’s done still counts towards the bar and stays visible in its room. The next day starts a fresh round with whatever is open then.

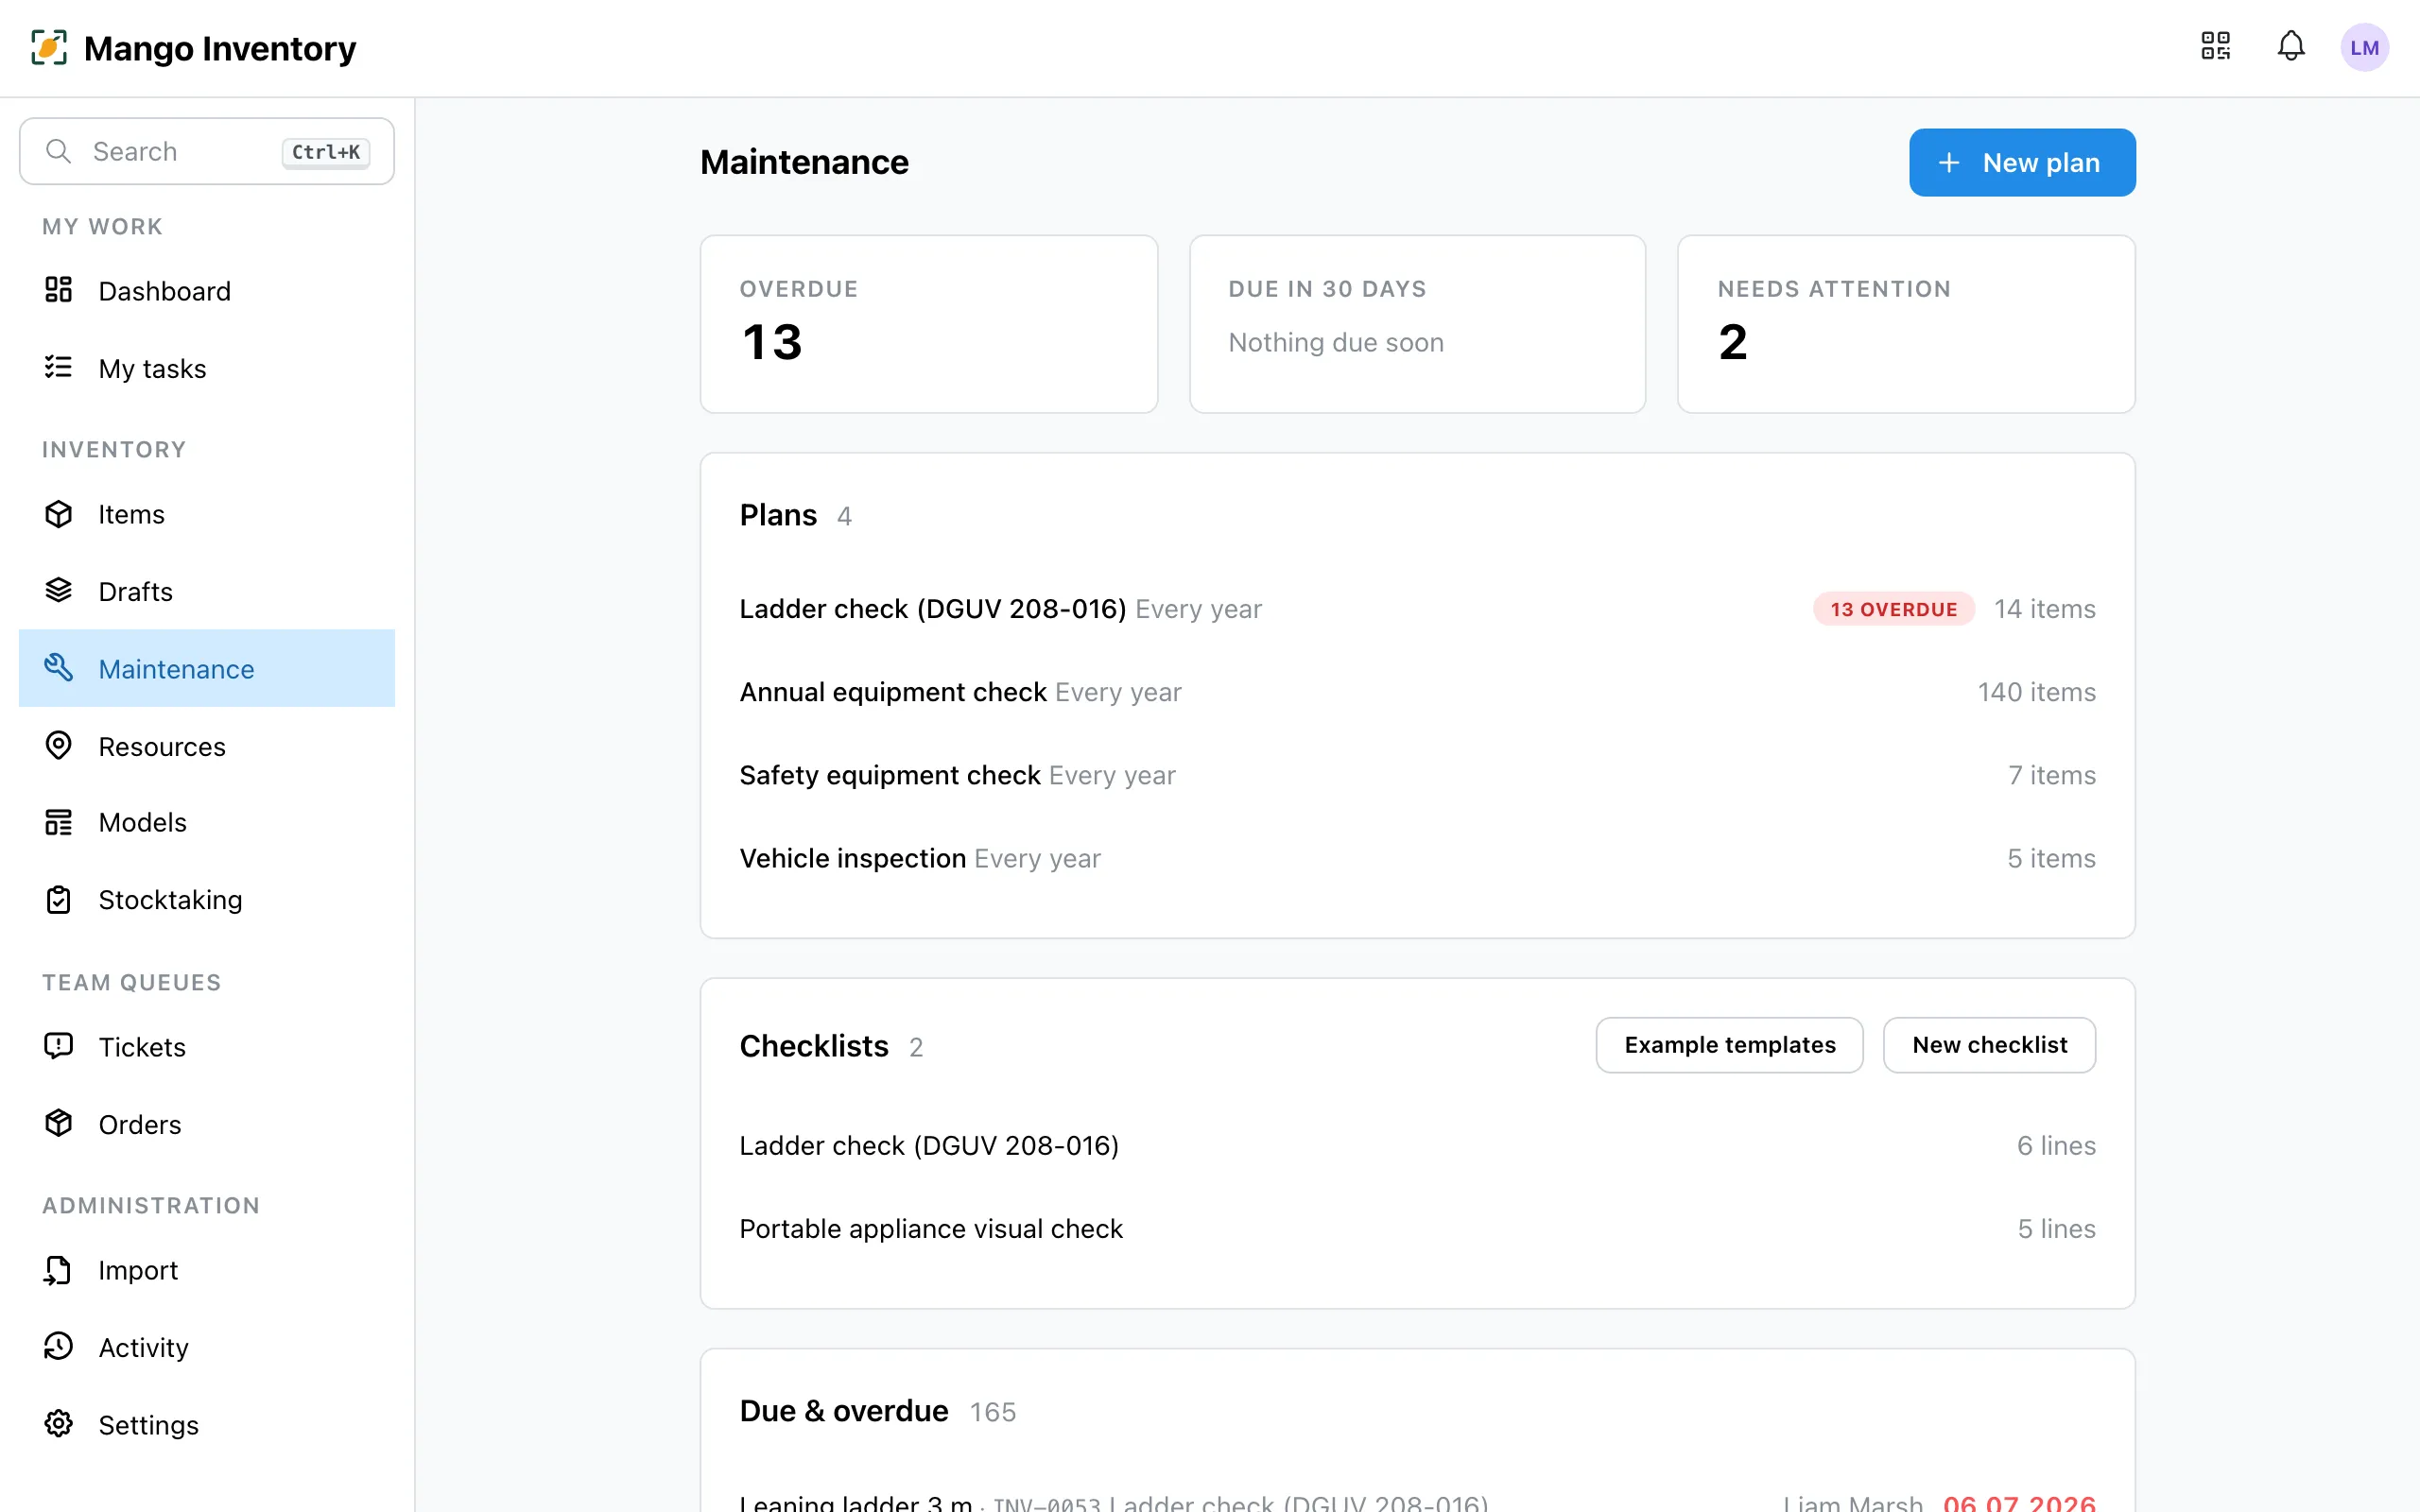
Maintenance overview with due dates and coverage

The “Maintenance” page answers three questions at a glance:

  • What is due or overdue? — the work list, linked to the tickets.
  • Which items have no plan? — the coverage gap, before the audit finds it.
  • What needs attention? — e.g. items that no longer match the filter, or devices in the plan reported lost.