
Check-out & locations
Every item has a home location — where it belongs. When it is checked out, you see where it is right now and who has it. And who had it before.
At a glance
Section titled “At a glance”- Check out to a person, room, vehicle or construction site — by scan or from the list. “Return” brings the device back to its home location.
- Who had it? — the history shows every check-out and return with the date: who had the device and where it was (History & records).
- Warning on defects — if a device has an open defect report or an overdue inspection, a warning appears before anyone drives off with the defective ladder.
- Receipt confirmation if you want it — the person confirms by email link that she has the items (Receipt confirmation).
- Many at once — scan, scan, scan, then assign everything at once.
- Locations as a tree — building → floor → room → shelf, as deep as you need.
Locations and people
Section titled “Locations and people”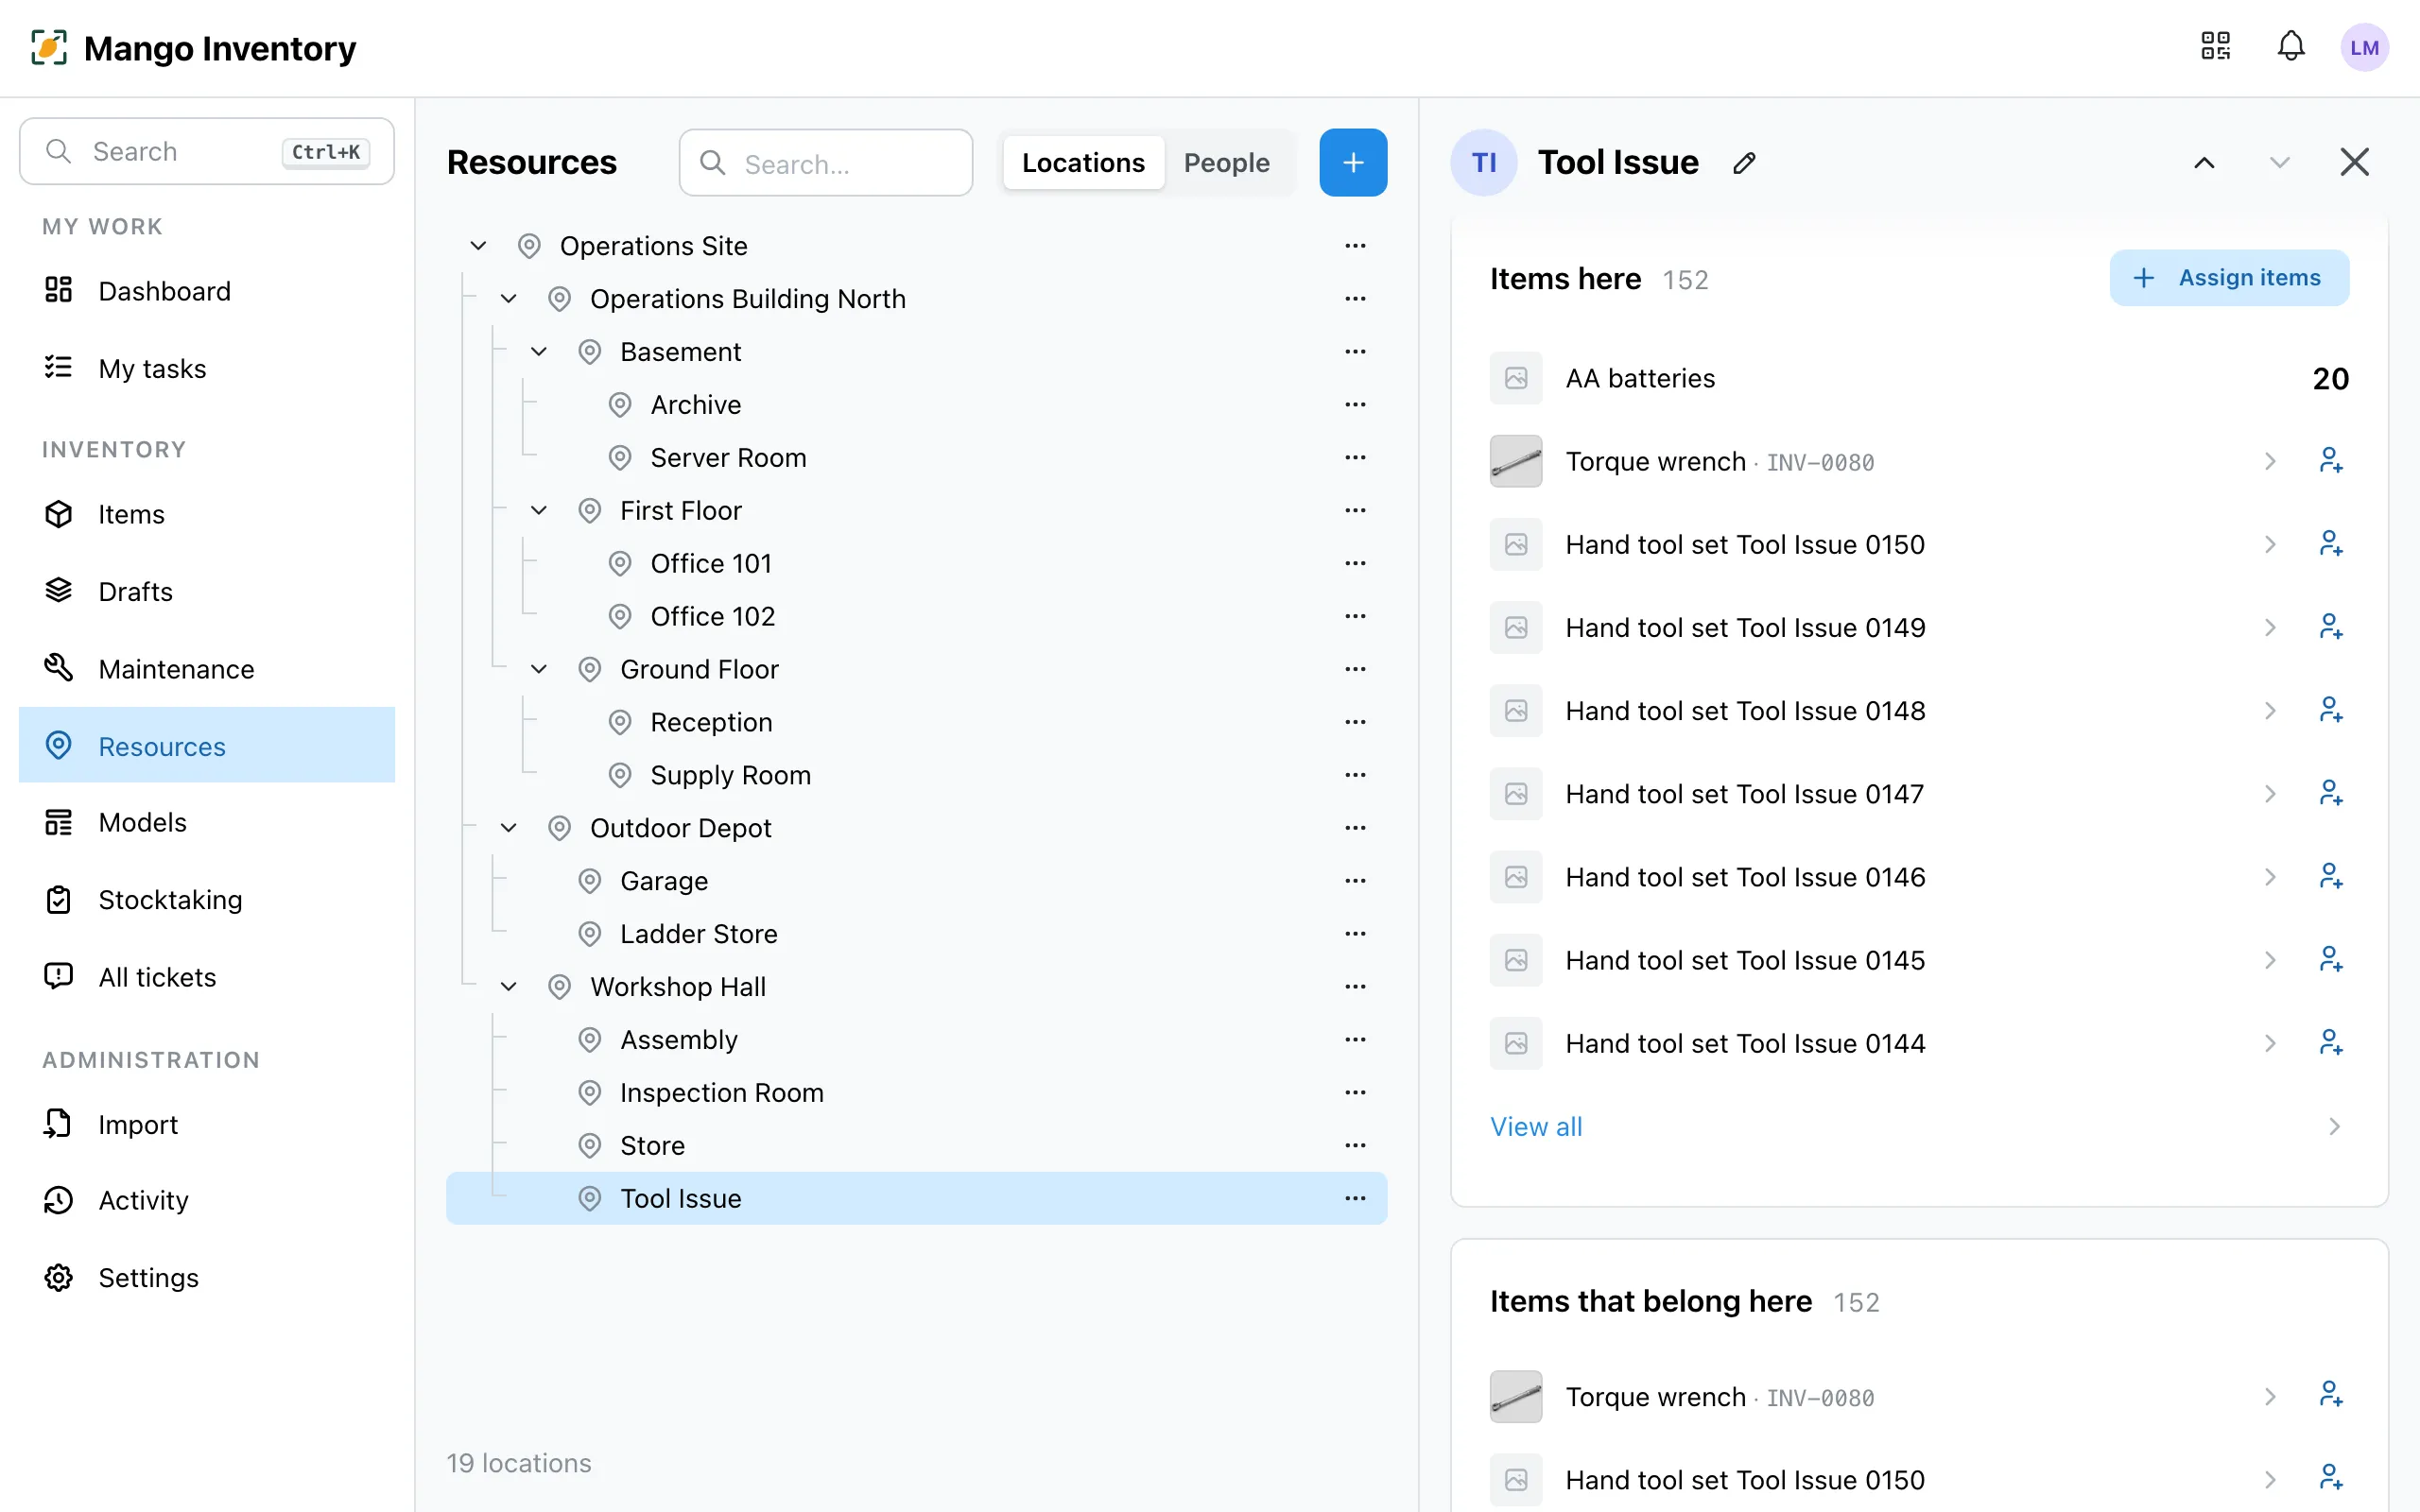
- Locations are anywhere equipment can be: buildings, rooms, storerooms, shelves — a vehicle or a construction site too. The full path shows everywhere (“Operations Site / Workshop Hall / Tool Issue”), so “Store” is never ambiguous.
- People can have items, with or without their own account.
- A click on a location or a person shows what is there or who has what.
Rearrange the tree by drag & drop. Merge entries that were created twice with “Merge into…”; items, stock and history are kept.
Checking out an item
Section titled “Checking out an item”In the app, checking out is called “Assign” — on the open item or in any list:
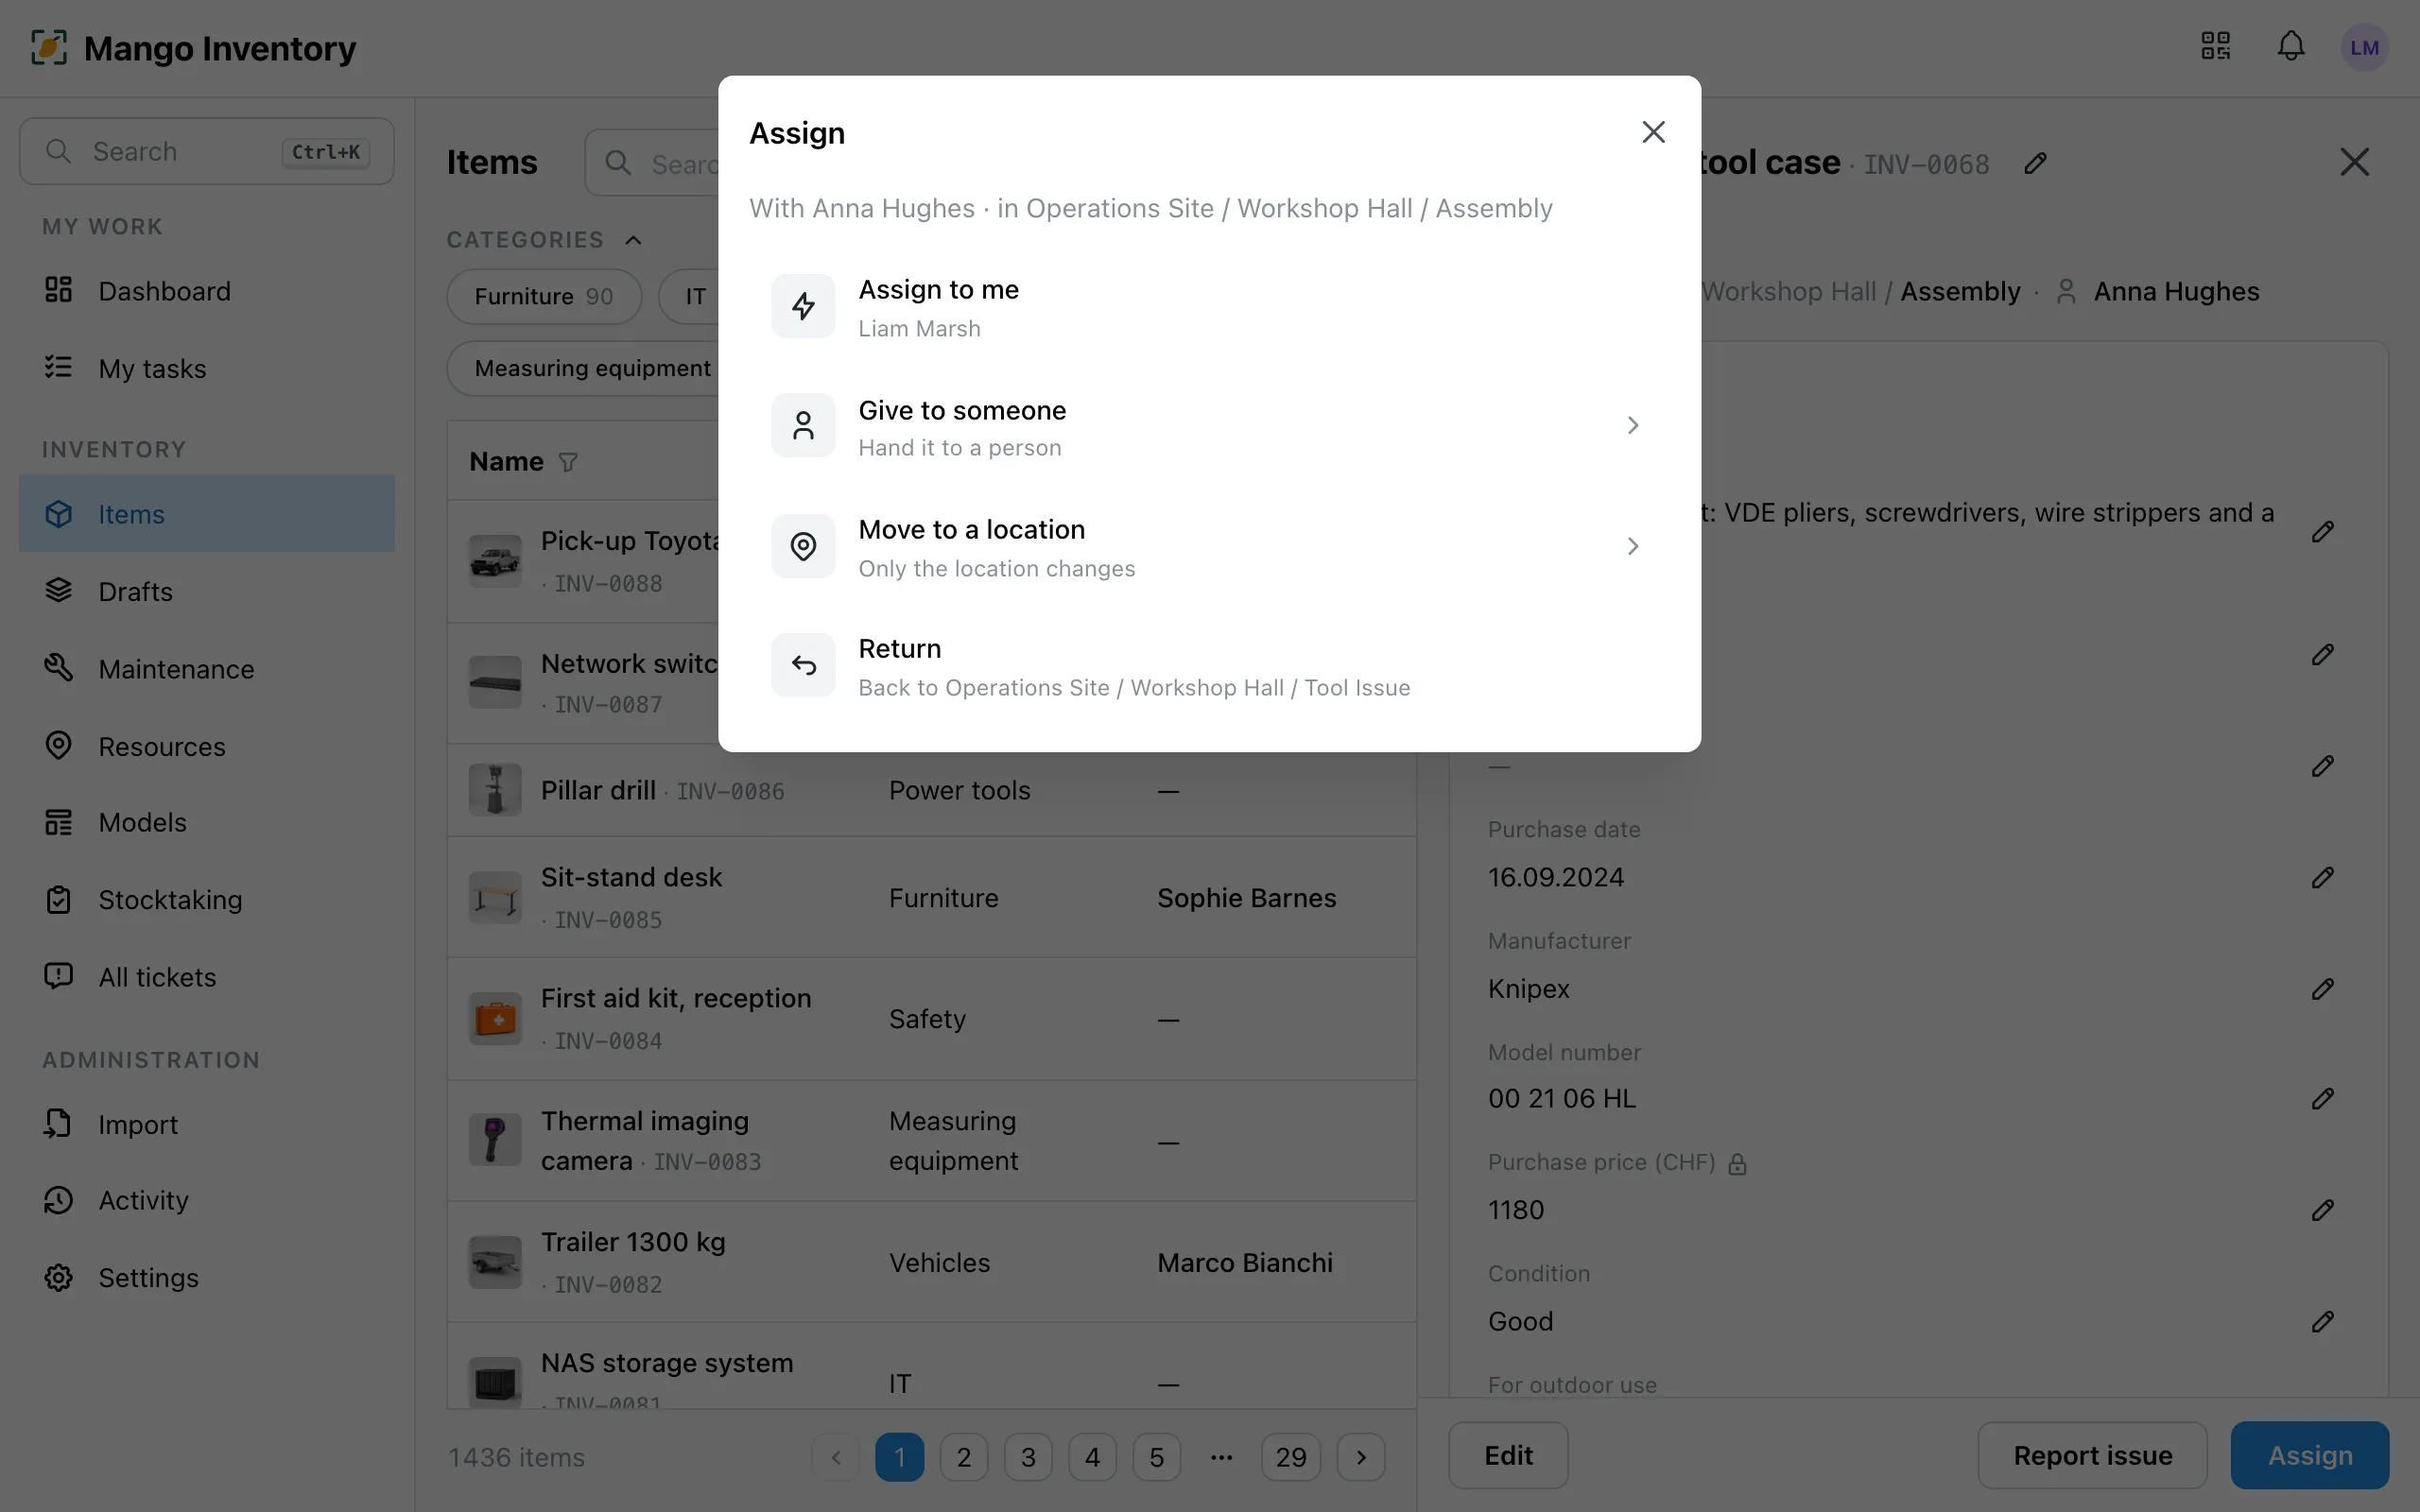
- Assign to me — the item is with you right away.
- Give to someone — pick a person, optionally with a room.
- Move to a location — only the place changes.
- Return — back to the home location.
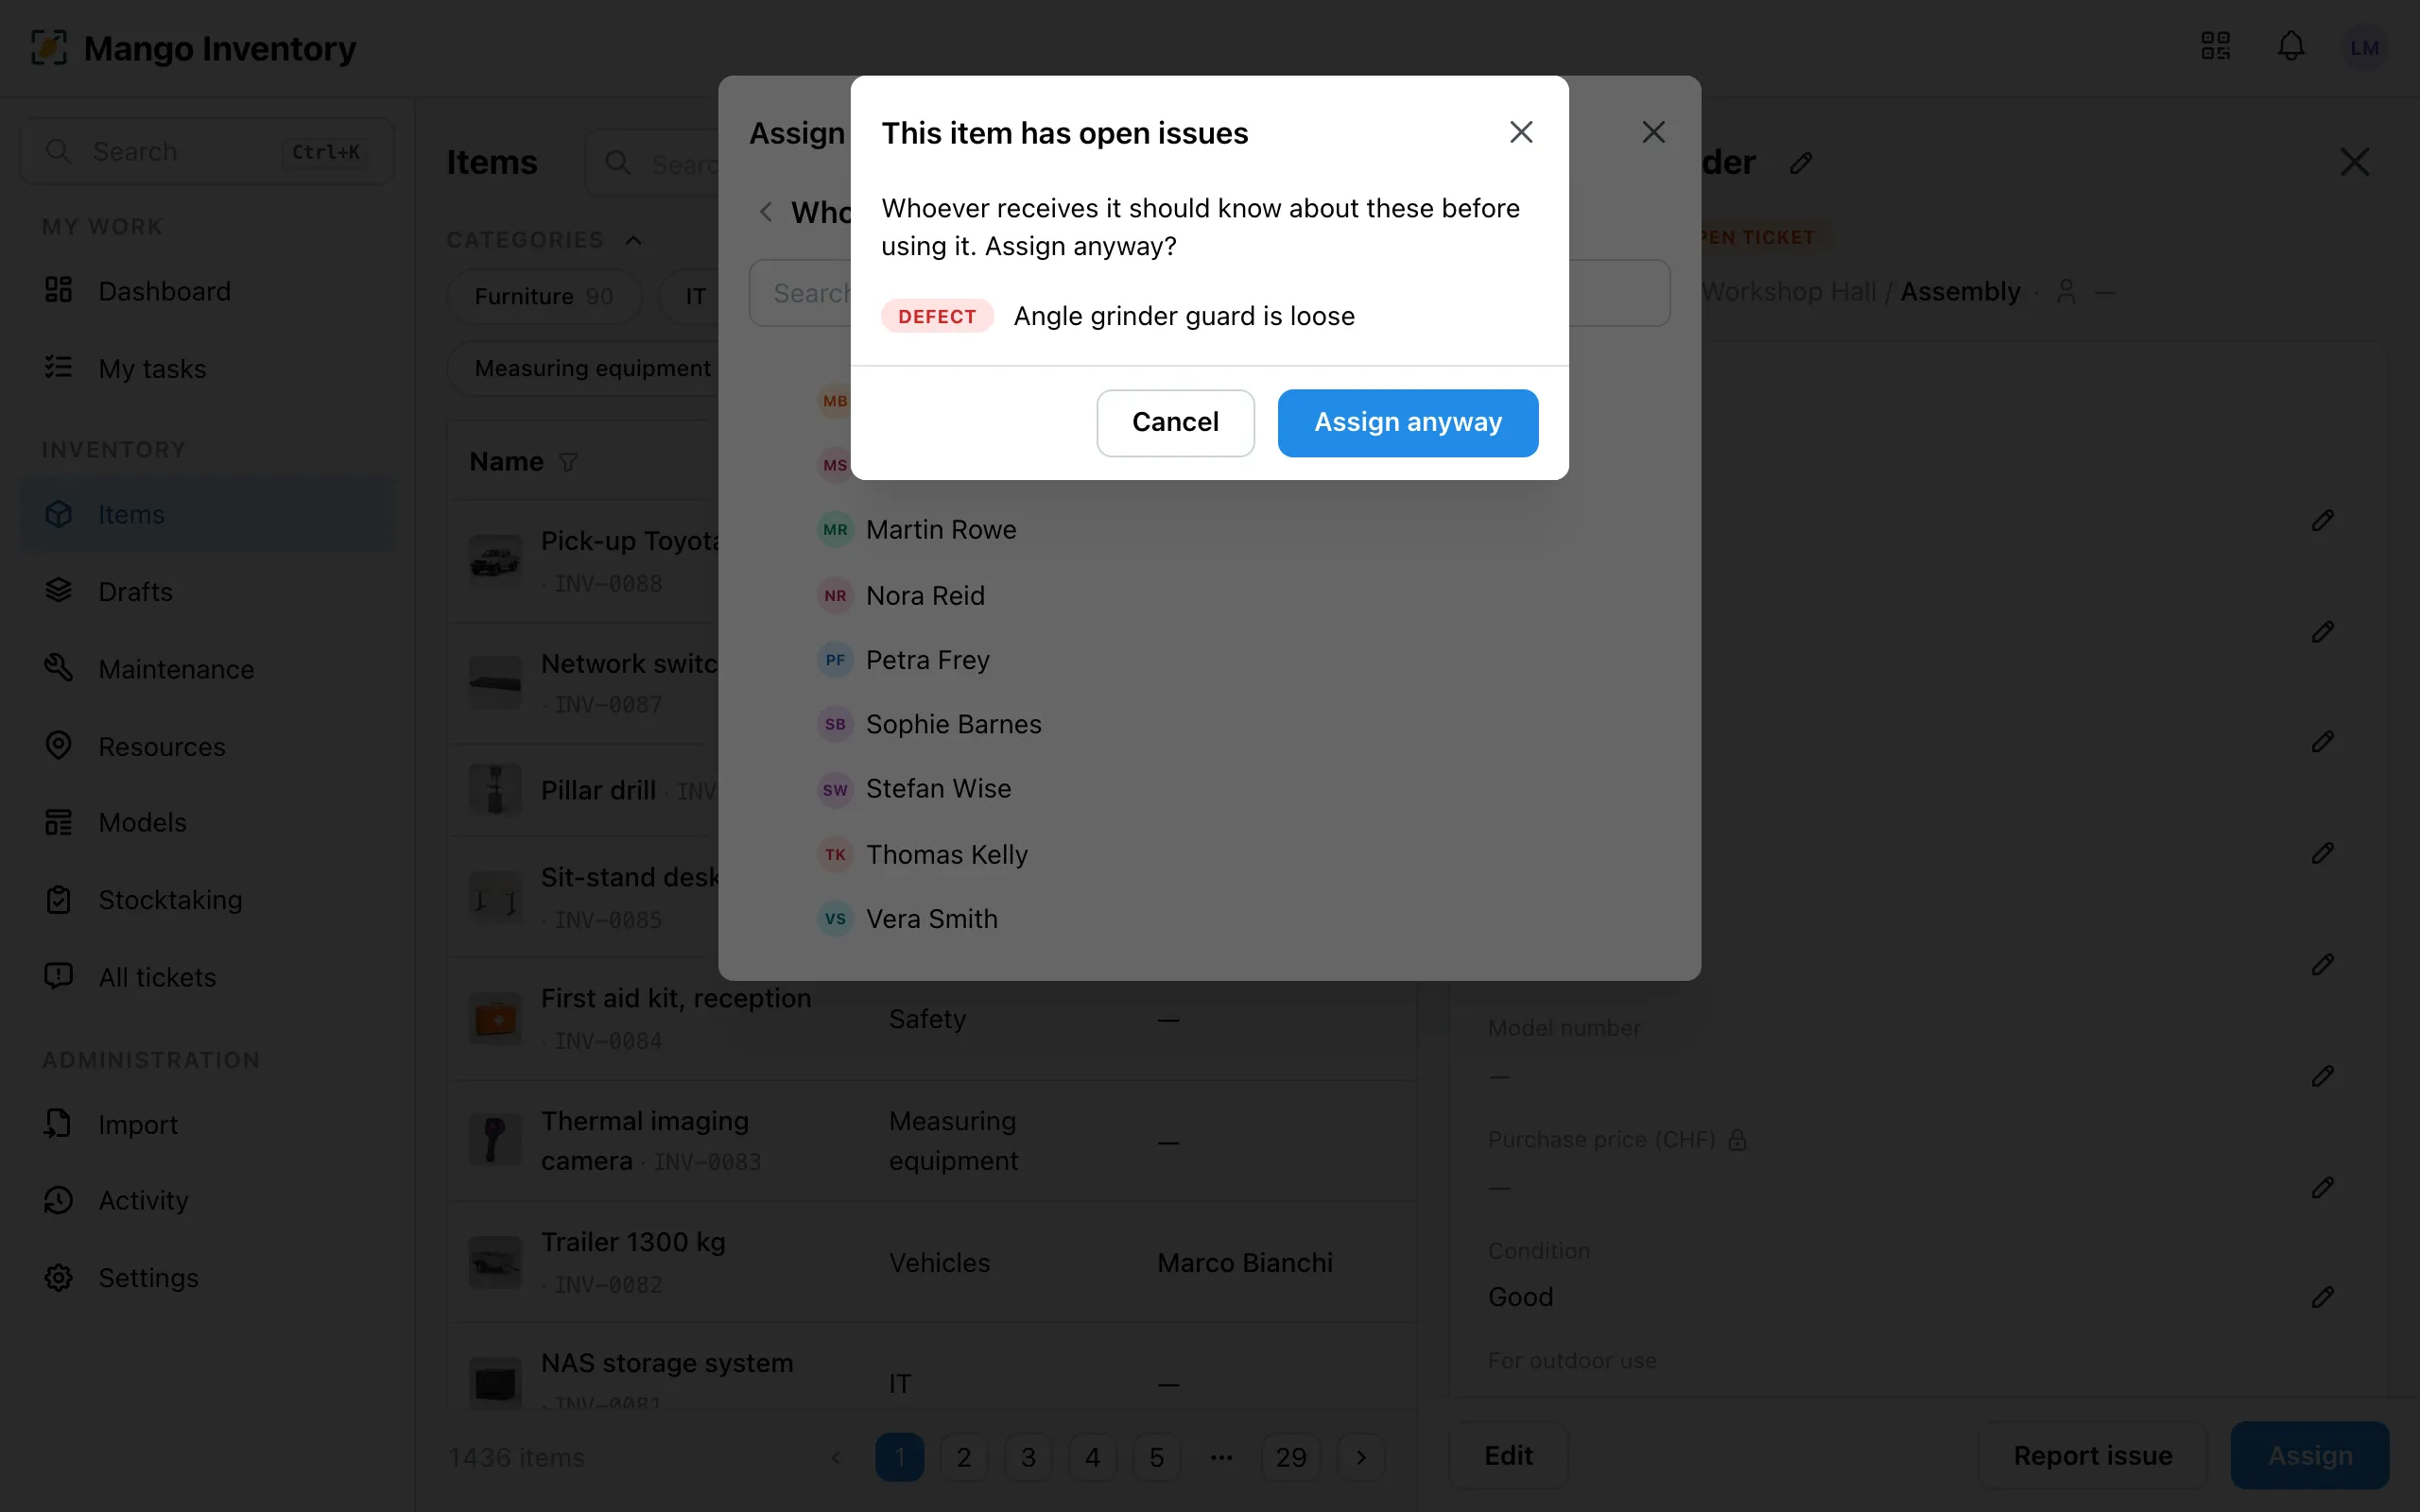
If the device has an open defect report or an overdue inspection, a warning comes first and names the ticket. With “Assign anyway” you hand it out knowingly.
Recently used people and rooms are ready as suggestions. Every change is recorded in the history. As long as the confirmation is showing, “Undo” reverses it.
For quantity items you also pick the amount: “3 of 35 available in Supply room” — more under Quantity items.
Many items at once
Section titled “Many items at once”-
From the target: on a room’s or a person’s page, “Assign items” — search, scan or browse, then assign everything with one click.
-
By scan: in the mobile app, pick the target once, then scan item after item and assign everything at once.
-
From the table: under “Items”, filter and set location or person for all matches with mass edit.